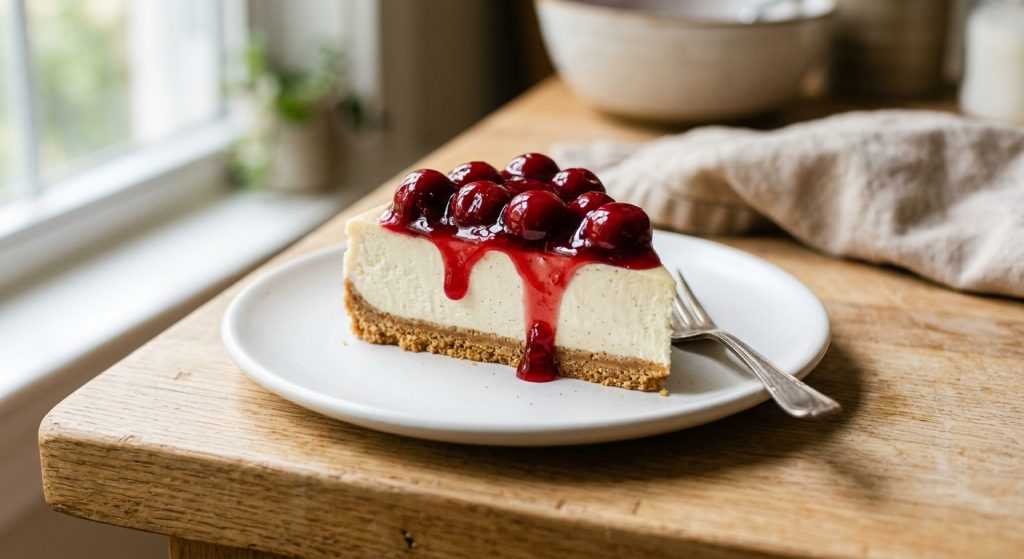
Hey friends! I know how it goes. You’re trying to get a decent dinner on the table, maybe help with homework, and then suddenly, the craving for something sweet hits. But who has time for complicated baking projects, especially when it involves turning on the oven for ages? That’s why I’m so excited to share my go-to **easy no bake cheesecake** recipe with you all. Seriously, this one is a lifesaver!
I’ve made this cheesecake countless times, tweaking it just right, and it always gets rave reviews. It’s got that perfect creamy texture, a lovely tangy sweetness, and a buttery graham cracker crust that holds up beautifully. Plus, you can make it ahead, which is a HUGE win for busy weeks. Get ready to add this one to your dessert rotation because it truly makes sweet cravings simple.
Getting That Perfect Graham Cracker Crust
A good no-bake cheesecake starts with a stellar crust, right? For this one, we’re using honey graham crackers, and the key is getting them super fine. Don’t just crush them roughly; you want a texture like beach sand, not pebbles. I toss mine into a food processor and let it run for about a minute. If you don’t have one, pop them into a sturdy zip-top bag and smash them with a rolling pin – it’s a great stress reliever! Once they’re powdery, we stir in a little brown sugar for extra depth and, of course, melted salted butter. The salted butter really balances the sweetness and adds a wonderful richness that you’ll notice in every bite.
When you mix in the butter, you’re looking for a consistency that clumps together when you squeeze it but also still looks crumbly. It shouldn’t be swimming in butter, but every crumb needs to be coated. The next crucial step is packing it into your pie plate. Use a flat-bottomed measuring cup or a sturdy glass to really press those crumbs down. Start in the center and work your way out, pushing the mixture up the sides of the plate evenly. This creates a solid foundation for your creamy filling and prevents it from crumbling when you cut into it. A few minutes in the freezer firms it up while you get the filling ready, ensuring a crisp separation when you serve. This step isn’t just about making it pretty; it truly makes the crust structurally sound and delicious.
Crafting the Cloud-Like Cheesecake Filling
Now for the star of the show: the filling! This is where the “no-bake” magic truly happens, and it’s surprisingly simple. First, you’ll whip heavy cream and powdered sugar to stiff peaks. This means when you lift your beaters, the cream stands straight up and doesn’t flop over. Cold cream whips best, so keep it in the fridge until you’re ready to use it. Over-whipping can turn it grainy, so stop as soon as those peaks hold their shape. This whipped cream provides the essential airiness and lightness to the cheesecake, making it feel decadent without being overly heavy. You’ll definitely want to get this right for the best texture.
In a separate bowl, you’ll combine room-temperature cream cheese, non-fat Greek yogurt, and vanilla extract. Room temperature cream cheese is non-negotiable here! If it’s cold, you’ll end up with lumps, no matter how long you whip it. The Greek yogurt adds a lovely tang that cuts through the richness of the cream cheese, and the vanilla extract, well, it’s just pure comfort. Whip this mixture until it’s super smooth and creamy. Then, the folding part: gently incorporate the whipped cream into the cream cheese mixture. Do this in two additions, using a spatula to fold rather than vigorously stir. This preserves all that lovely air you just whipped into the cream, giving your cheesecake its signature light, fluffy, yet rich texture. Don’t rush it; gentle folding ensures a consistent, airy filling.
Making Your Easy No-Bake Cheesecake a Success
Once your beautiful, airy filling is ready, it’s time to spoon it into that chilled graham cracker crust. Try to get it in there without squishing the crust too much. Once it’s all in, I have a little trick for you: gently lift the pie plate an inch or so off the counter and then just drop it a few times. Don’t slam it, just a gentle tap-down. This helps release any trapped air bubbles inside the filling, which can sometimes leave holes or an uneven texture. It also helps the filling settle uniformly, giving you a smooth, professional-looking top. Then, a quick smoothing with a spatula, and you’re almost done!
The waiting game is the hardest part, I know! This **easy no bake cheesecake** needs at least 6 hours in the fridge to fully set up. Overnight is even better if you can manage it. The chill time allows all the ingredients to firm up and meld together, transforming it from a creamy mixture into a sliceable, stable cheesecake. To prevent any weird skin from forming on top, press a layer of plastic wrap directly onto the surface of the filling before covering the whole thing with foil. When it’s time to serve, if you find your crust is clinging to the pie plate a bit, a warm, damp dish towel placed under the plate for a minute will work wonders to loosen it right up. You’ll be slicing through it like a dream, and everyone will be impressed by this effortlessly elegant dessert!