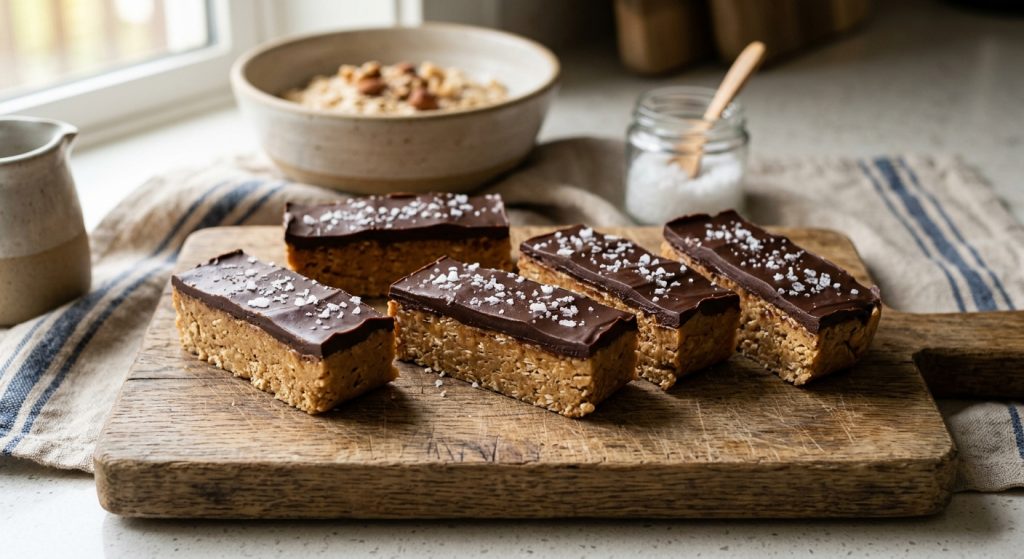
Okay, friends, I just *have* to tell you about these no bake peanut butter bars I made last night. Seriously, they’re a lifesaver when you need something sweet but don’t have hours to spend in the kitchen. I whipped up a batch after dinner, and by the time I folded a load of laundry, they were ready to slice. As a busy parent myself, I’m always on the hunt for those magical recipes that deliver big flavor with minimal fuss, and this one absolutely fits the bill.
I’ve tinkered with so many no-bake dessert recipes, trying to find that perfect balance of creamy, sweet, and salty. This one nails it. The base is rich and satisfying, full of that classic peanut butter goodness, and the chocolate topping sets up beautifully without getting too hard. Plus, it only takes one bowl to mix most of it, which means way less cleanup. You are going to love how easy these no bake peanut butter bars come together!
Getting Started: The Peanut Butter Base
Alright, let’s talk about that amazing base for these no bake peanut butter bars. It’s what makes them so satisfying! First things first, grab your loaf pan and line it with parchment paper. Make sure you leave a nice overhang on the long sides – you’ll thank me later when you’re pulling the whole delicious block out of the pan without a struggle. It’s a little step that saves a lot of frustration, especially when you’re in a hurry.
For the peanut butter itself, I really recommend using a natural, drippy kind, the kind where the only ingredients are peanuts and salt (or just peanuts!). Those processed, stiffer peanut butters can make the base a bit too dry and crumbly, or not spread as easily. You want that creamy, slightly oily texture that binds beautifully with the almond flour and maple syrup. Stir everything together in a medium bowl until it’s super well combined. It should be thick, but still pliable enough to press. Once you’ve got it, dump it into your lined pan and use the back of a spoon or your hands to press it down firmly and evenly. Make sure it’s packed in tightly so your bars hold their shape.
Perfecting the Chocolate Topping
Now for the best part: the chocolate topping! This is what turns these into actual no bake peanut butter bars, just like your favorite candy. You can melt your chocolate chips two ways: in the microwave or on the stovetop. If you’re using the microwave, do it in short bursts – 30 seconds at a time – and stir really well in between each. Chocolate can go from perfectly melted to burnt in a flash, so low and slow is the name of the game here. You’re looking for a smooth, pourable consistency without any lumps. No need to dirty another bowl, just reuse the one from the base mixture!
If you prefer the stovetop, set up a simple double boiler. Place your chocolate chips in a heat-safe bowl over a small pot of simmering water, making sure the bowl doesn’t touch the water. The steam will gently melt the chocolate. Once your chocolate is beautifully melted, stir in the extra peanut butter and a little coconut oil. The coconut oil isn’t just for shine; it helps the chocolate set up with a slightly softer, more fudgy texture when it’s cold, rather than snapping hard. It makes for a much nicer bite. Stir until it’s completely smooth and glossy, then pour it over your peanut butter base. A sprinkle of flaky sea salt on top right now? Absolutely!
The Grand Finale: Set and Slice
With the chocolate topping poured and looking perfect, it’s time for the final magical step: setting. Pop your loaf pan into the freezer. Twenty minutes is usually all it takes for that chocolate layer to firm up nicely. You’ll know it’s ready when the chocolate looks completely set and isn’t sticky or soft when you lightly touch it. This quick chill time means you’re not waiting around for hours, which is perfect for busy afternoons when you need a speedy treat.
Once they’re firm, lift the entire block of bars out of the pan using those parchment paper overhangs you strategically left. Place it on a sturdy cutting board. Now for slicing! I find that using a long, sharp knife, warming it up under hot water, and wiping it clean between each cut gives you the cleanest edges. These bars are super rich and satisfying, so I typically slice them into about 14 pieces. They’re a decadent little square that really satisfies a sweet tooth without needing a huge portion. They’re so good right out of the freezer, but even better after sitting for a few minutes to soften just a touch. Just remember to store any leftovers in the fridge!