Opens in a new tab

Homemade Instant Pot Chicken Stock: Your New Kitchen Staple!

TOTAL TIME
SERVES
COURSE
DIFFICULTY
Tested5× before publishing

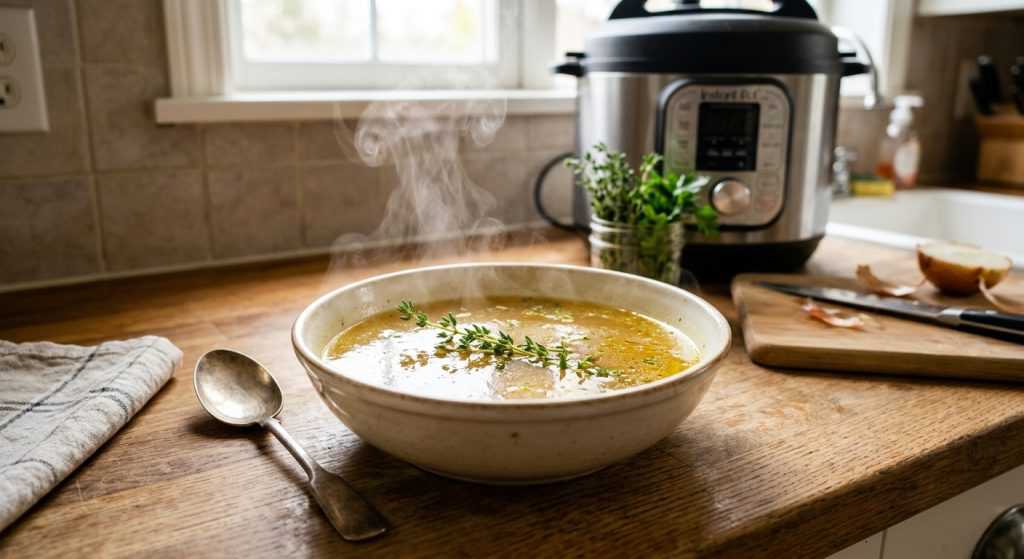
Making homemade instant pot chicken stock is one of those kitchen tasks that feels so incredibly rewarding, and honestly, it’s a total lifesaver for busy parents. I know, I know – making stock sounds like a big project, right? But with the magic of a pressure cooker, we’re talking about very little hands-on time for a seriously rich, nourishing liquid that makes everything else you cook taste a million times better.

I’ve tinkered with this recipe so many times, perfecting it for maximum flavor with minimal effort, and I’m telling you, it’s simply THE BEST. Imagine having a freezer full of this golden goodness, ready to transform weeknight soups, quick risottos, or even just a simple pan sauce into something truly special. Let’s get this done!

Why Make Homemade Instant Pot Chicken Stock?

Okay, let’s be real for a sec: why bother making homemade instant pot chicken stock when you can just grab a carton at the grocery store? The answer, my friend, is flavor, control, and a whole lot of kitchen cred! Store-bought stocks, even the good ones, often have added sodium, preservatives, or just a somewhat flat taste. This homemade version? It’s bursting with a deep, savory richness that truly enhances anything you add it to. You control the salt, you control the ingredients, and you get that beautiful gelatinous texture that makes soups feel so much more luxurious.

Beyond the amazing taste, making your own stock is surprisingly economical. Chicken wings are often pretty affordable, or you can use leftover bones from a roasted chicken – talk about zero waste! It’s also incredibly satisfying to know exactly what’s going into your family’s meals. Think of this as your secret weapon in the kitchen. Once you have a stash of this golden elixir, you’ll find yourself reaching for it constantly, making everything from gravies to grains shine. It’s a little upfront effort for a huge payout in deliciousness all week long. Plus, your kitchen will smell absolutely divine while it’s cooking!

Getting Your Instant Pot Ready for Stock

Prepping for this `homemade instant pot chicken stock` is seriously minimal, which is part of its charm. You don’t need to get fancy with your vegetable prep. For the onion and garlic, we leave the skins on! Those outer layers actually add color and extra depth of flavor to your stock. Just give them a quick rinse and a rough chop – halving them is usually enough. For the carrot, a scrub is good; no need to peel it either, same reason as the onion. The ginger, if you’re using it, also gets a scrub and a rough chop.

For the chicken, wings are my go-to for incredible body because of their high collagen content, which turns into that lovely gelatin we want in a good stock. If you’ve got a bag of saved chicken bones from roasted chickens in your freezer, those are fantastic too! Just make sure whatever chicken parts you use are relatively clean. Toss everything into the Instant Pot, add the thyme, bay leaves, and peppercorns. Then, fill it up with water. This is crucial: make sure you don’t exceed the ‘max fill’ line marked inside your Instant Pot. Overfilling can be dangerous and prevent proper pressure buildup. A little common sense here goes a long way to keeping your kitchen safe and your stock perfect.

The Pressure Cooking Magic & What to Expect

Now for the fun part: letting your Instant Pot do all the heavy lifting! Once you’ve got everything in there and the lid is locked, make sure the steam release valve is set to ‘Sealing.’ This is important because it prevents steam from escaping and allows the pot to build pressure properly. Set it for 40 minutes on high pressure. While it’s cooking, you’ll hear it build pressure, then it will be surprisingly quiet. This is when all those incredible flavors are infusing into the water, and the collagen in the chicken is breaking down, giving you that beautiful body.

When the 40 minutes are up, the Instant Pot will beep. Now, for the manual pressure release. Be careful here! I always recommend using a long-handled spoon or tongs to nudge the valve to the ‘Venting’ position. Stand back, because a powerful stream of steam will come rushing out. It can sputter a bit as it releases, so don’t have your face right over it! Once the float valve drops, it’s safe to open the lid. You’ll be greeted with the most incredible aroma – rich, savory, and comforting. The liquid will be a beautiful golden hue, and the chicken and vegetables will look totally spent, having given their all to create this fantastic base for your future meals.

Cooling, Skimming, and Storing Your Golden Stock

After the pressure has released and you’ve admired your work, the next step is straining. Place a fine-mesh sieve over a large, sturdy bowl. Carefully pour the entire contents of the Instant Pot through the sieve. You’ll want to gently press on the solids with the back of a spoon to extract every last drop of that precious liquid. Once you’ve got all the stock, discard the spent vegetables and bones. They’ve done their job admirably!

Now for seasoning. This part is optional, but I like to add a touch of kosher salt to my stock at this stage. It helps bring out all those delicious flavors. Give it a stir and taste – remember, you can always add more salt later when you’re actually using the stock in a recipe. The most important step next is letting the stock cool completely. You can leave it on the counter for a while, then transfer it to the fridge. As it chills, the fat will rise to the surface and solidify. This makes it super easy to skim off with a spoon, giving you a beautiful, clear stock. Once cooled, ladle it into airtight containers or freezer-safe bags. I love freezing it in 2-cup portions, so it’s ready for any recipe. This homemade liquid gold will keep in the fridge for about 4 days or in the freezer for up to 6 months!

AD — Mediavine Content 300×250 / Responsive

Why This Recipe Works

The Instant Pot's high-pressure environment is key here. It drastically reduces cooking time while extracting maximum flavor and collagen from the chicken bones and vegetables. This creates a deeply savory, richly colored, and naturally gelatinous stock that's far superior to many store-bought options. The optional ginger adds a subtle warmth and aromatic complexity, while leaving the onion and garlic skins on contributes to the beautiful golden hue and deeper flavor profile.

This homemade chicken stock is truly liquid gold – once you make it, you'll never go back!— Charlotte
AD — Mediavine Native / 728×90 Leaderboard

Prep 15 minutesCook 40 minutes (pressure cook)Yield About 2 quarts
Ingredients
  • 1 large onion, unpeeled, halved
  • 1 large carrot, scrubbed, halved
  • 1 head of garlic, halved crosswise
  • 1 (1-inch) piece fresh ginger, scrubbed, halved (optional)
  • Handful of fresh thyme sprigs
  • 2 dried bay leaves
  • 3 pounds chicken wings or chicken bones
  • 1 teaspoon whole black peppercorns
  • 1 ¼ teaspoons kosher salt (optional, for seasoning after cooking)
Instructions
  1. Combine Ingredients Add the halved onion, carrot, and garlic to your Instant Pot. If you're using it, toss in the ginger too. Then, add the thyme sprigs, bay leaves, chicken wings or bones, and the whole black peppercorns. Pour in 3 quarts of water, making sure not to go past the 'max fill' line on your pot.
  2. Pressure Cook Secure the lid on your Instant Pot and turn the venting knob to the 'Sealing' position. Select 'Manual' or 'Pressure Cook' on 'High' pressure and set the timer for 40 minutes. Once the cooking cycle is complete, carefully do a manual pressure release. Be mindful, as the valve will release steam and might sputter a bit.
  3. Strain and Season Once all the pressure has released, carefully open the lid. Place a fine-mesh sieve over a large, heatproof bowl and carefully pour the entire contents of the Instant Pot through the sieve. Discard all the solids – they’ve given their all! If you like, stir in the optional kosher salt until it dissolves. Taste and adjust to your preference.
  4. Cool and Store Let the chicken stock cool completely at room temperature. As it cools, any fat will rise to the surface. You can skim this off with a spoon once it's fully cooled or even after it's chilled in the refrigerator, when the fat will solidify. Transfer the cooled stock to airtight containers or freezer-safe bags. It keeps beautifully in the fridge for up to 4 days, or you can freeze it for up to 6 months.
Tested Tip

For the absolute best, most gelatinous stock, let the strained liquid cool completely in the refrigerator overnight. The next morning, you can easily scrape off the solidified fat layer with a spoon, leaving you with a crystal-clear, incredibly rich stock. This also makes portioning for freezing a breeze!

AD — Mediavine Content 300×250 / Responsive

Why Make Homemade Instant Pot Chicken Stock?

Getting Your Instant Pot Ready for Stock

The Pressure Cooking Magic & What to Expect

Cooling, Skimming, and Storing Your Golden Stock

Make It Yours

  • Add More Aromatics — Feel free to toss in extra herbs like a few sprigs of parsley or even a leek (white and light green parts, roughly chopped) for a slightly different flavor profile. A star anise pod can also add a subtle, warming note if you're feeling adventurous!
  • Spice It Up — If you enjoy a bit of a kick, add a few dried chiles or a small piece of fresh turmeric root (scrubbed, halved) along with the ginger. This can create a stock with an extra layer of warmth and a beautiful golden color, especially great for Asian-inspired dishes.
  • Vegetarian Version — While this recipe focuses on chicken, you can easily adapt the method for a rich vegetable stock. Skip the chicken and add extra veggies like mushrooms, celery, parsnips, and maybe even a tablespoon of nutritional yeast for a savory, umami boost. Adjust cooking time to 30 minutes.
  • Less Sodium — If you're watching your sodium intake, simply omit the kosher salt in the final step. You can always season individual dishes to your preference when you use the stock. This gives you maximum flexibility.
AD — Mediavine Content / Native

FAQ

Can I use a whole chicken for this stock?

Yes, you absolutely can! If you're using a whole chicken, I recommend breaking it down first (or using the carcass after roasting and eating the meat). The bones are where a lot of the flavor and collagen come from. You might need to adjust the water level to ensure you don't exceed the max fill line of your Instant Pot.

What's the difference between stock and broth?

Great question! Generally, stock is made with bones, which gives it a richer, more gelatinous texture due to the collagen. Broth is typically made with meat and vegetables, resulting in a lighter flavor and less body. This recipe makes a true stock, perfect for adding depth to almost any dish.

How long does it take for the Instant Pot to come to pressure?

The time it takes for your Instant Pot to come to pressure can vary depending on the amount of liquid and the starting temperature of your ingredients. For this recipe, with 3 quarts of water, it typically takes about 10-15 minutes before the 40-minute cooking cycle actually begins. So factor that into your total time!

Why is it important to cool the stock completely before storing?

Cooling the stock completely is essential for food safety reasons. Rapid cooling helps prevent bacteria from growing. Also, once it’s cold, the fat will solidify on top, making it super easy to skim off for a clearer, less fatty stock. Never put hot stock directly into the fridge or freezer, as it can raise the temperature of other foods and potentially harm your appliance.

AD — Mediavine 728×90 Leaderboard / Responsive

What To Serve With This

  • Cozy Chicken Noodle Soup
  • Creamy Mushroom Risotto
  • Quick Pan Gravy for Roasted Chicken
  • Velvety Potato Leek Soup
  • Braised Short Ribs
  • Flavorful Quinoa or Couscous

This post contains affiliate links. We may earn a small commission at no extra cost to you.

More Recipes You'll Love

Tested twice, weeknight-ready, family-approved.
