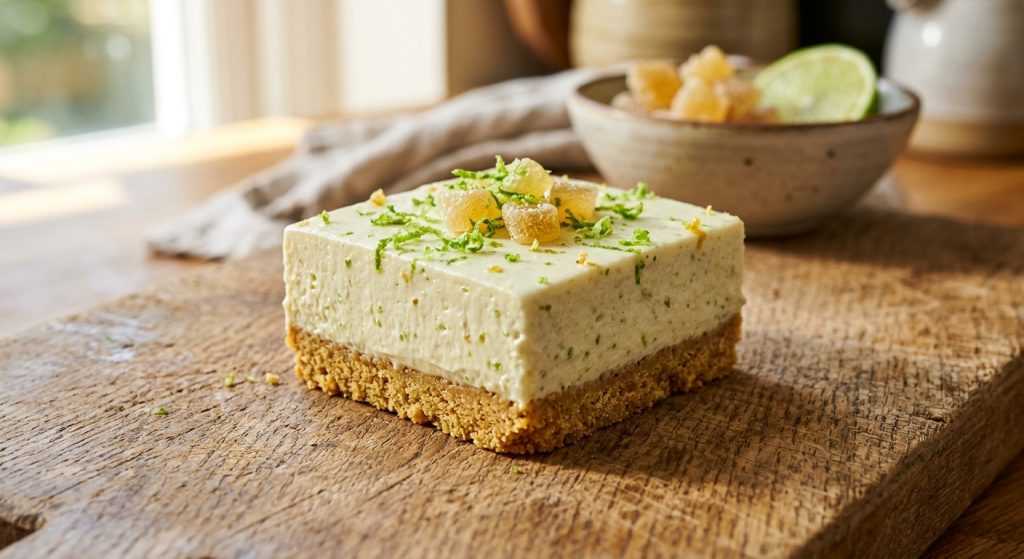
Okay, busy parents, let me tell you about these incredible no bake cheesecake bars I just made. They’re a total lifesaver for when you need a dessert that feels fancy but takes minimal active time. You know those moments when you just crave something bright and zesty, maybe with a little kick? These bars hit all those notes, and then some!
I’ve tested this recipe a few times now, tweaking things to make sure it’s absolutely foolproof. The gingersnap crust is wonderfully crisp, the lime curd is super vibrant, and the cheesecake filling is creamy perfection. Plus, since they chill in the freezer, they’re the ultimate make-ahead treat, perfect for any gathering or just a quiet night after the kids are in bed. Trust me, you’ll want to add this one to your regular rotation.
Getting That Super Crispy Gingersnap Crust
Alright, let’s talk crust! This is the foundation of our lovely dessert, and it needs to be perfect. The gingersnap cookies bring such a fantastic spice, which plays so well with the lime. You really want to get those cookies pulsed down into super fine crumbs in your food processor. If they’re too chunky, your crust won’t hold together as well. Think of it like a fine beach sand texture.
When you add the melted butter, the crumbs should transform into something that looks like wet sand. This is your cue that you’ve got the right consistency. The most crucial part here is pressing it down into the pan. And I mean REALLY press it. I always use the flat bottom of a measuring cup. You want it super compact and even across the whole bottom of the pan. This density is what gives you that satisfying crunch when you bite into it, rather than a crumbly mess. Don’t rush this step! A firm crust prevents the filling from seeping underneath and ensures your bars hold their shape beautifully. A quick freeze sets it up perfectly while you get the other layers ready.
Whipping Up the Dreamy Cheesecake Filling
The filling for these no bake cheesecake bars is what dreams are made of – creamy, tangy, and so refreshing. First, don’t skip the step of whipping that heavy cream until it forms stiff peaks. This adds a wonderful lightness and airiness to the filling. You’ll know it’s ready when you can pull the whisk out, and the cream holds its shape without collapsing. Over-whipping can make it grainy, so keep an eye on it!
Next, make sure your cream cheese is at room temperature. This is key for a smooth, lump-free filling. If it’s too cold, you’ll end up with stubborn little bits of cream cheese, no matter how long you beat it. Sifting the powdered sugar into the cream cheese mixture also helps prevent lumps and gives you that silky texture we’re aiming for. The fresh ginger adds a warm, spicy zing that’s unexpected but absolutely delightful, and the lime juice brightens everything up. When you fold in the whipped cream, be gentle! You want to incorporate it without deflating all that lovely air you just worked to build. This makes for a truly luxurious, melt-in-your-mouth filling.
Mastering the Zesty Lime Curd Layer
This lime curd is the star that ties everything together. It’s tart, bright, and so vibrant against the creamy filling and spicy crust. Making curd on the stovetop can feel a little intimidating, but it’s actually really straightforward. The key is to whisk constantly. Don’t walk away! This prevents the eggs from scrambling and ensures a smooth, glossy curd. You’ll start with just whisking the eggs, sugar, lime juice, and salt.
Once that sugar is dissolved, you’ll gradually whisk in the butter, piece by piece. Adding it slowly helps it emulsify properly, creating that luscious, thick consistency. You’ll know it’s done when it’s thick enough to coat the back of a spoon. If you run your finger across the spoon and it leaves a clean line, you’re good to go! Don’t worry if it seems a bit thin at first; it really thickens up as it cools. Straining it through a fine-mesh sieve is another little trick that ensures your curd is super silky, catching any tiny bits of ginger or egg that might have formed. And remember to press that plastic wrap right onto the surface when chilling – no one wants a skin on their beautiful curd!
Assembling Your Zesty No Bake Cheesecake Bars
Now for the fun part: putting it all together! You’ve got your firm gingersnap crust, your creamy cheesecake filling, and your chilled, vibrant lime curd. Layering them is simple, but each chill step is important to get those nice clean lines when you cut into them. Make sure the cheesecake filling is truly set before you add the curd. It should feel firm to the touch.
When you spread the curd over the filling, aim for an even layer. The curd adds such a beautiful pop of color and flavor. Once that’s done, back to the freezer for its final chill. These bars will never be rock-solid like ice cream, but they’ll be firm enough to cut and handle. The parchment paper overhang is your best friend here – it makes lifting the entire block out of the pan an absolute breeze. A quick run of a knife along the unlined edges and then you just pull it right out. Cutting them into neat bars is so satisfying, and the final sprinkle of candied ginger and lime zest just makes them look extra special. They truly are the perfect dessert for a warm day or anytime you need a refreshing treat that’s easy to make ahead!