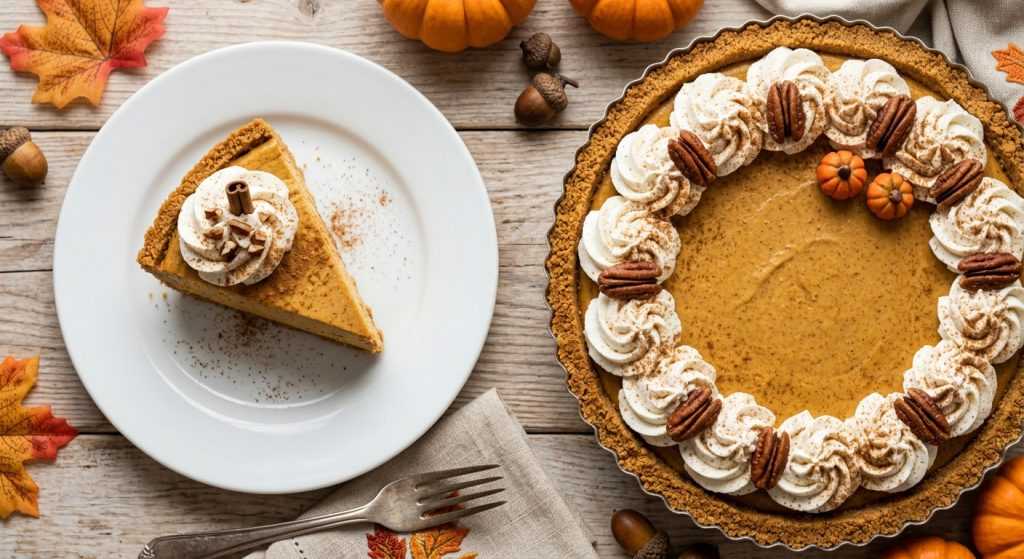
Hey there, busy moms! This week, I stumbled upon a new dessert that’s become a total lifesaver, especially with all the holiday craziness starting up. We’re talking about an amazing pumpkin no bake cheesecake that genuinely comes together in about 15 minutes of active time. No joke! I’ve been testing out quick desserts, and this one hit all the right notes: simple ingredients, minimal effort, and absolutely delicious for the whole family.
Seriously, I made this after a super hectic day, and it was so satisfying to just mix a few things, pop it in the fridge, and then have a decadent, creamy dessert ready a few hours later. It tastes like fall in every bite – warm spices, sweet pumpkin, and that classic tangy cheesecake texture. Plus, it’s lighter than a traditional baked cheesecake, which feels like a win. You’re going to love how easy this is to pull off when you need a little something special without all the fuss.
1. Whipping Up That Dreamy Pumpkin Cheesecake Base
The magic for this pumpkin no bake cheesecake truly starts with the base. First things first, get your cream cheese out of the fridge a good hour or two before you plan to start. This is not a suggestion, it’s a must for achieving that silky-smooth texture we’re after. Cold cream cheese leads to a lumpy filling, and no amount of whipping will fix that completely. Once it’s soft enough to easily indent with your finger, you’re ready to go. Toss the softened cream cheese into a big mixing bowl. Add in your pure canned pumpkin (make sure it’s 100% pumpkin puree, not pie filling!), vanilla extract, ground cinnamon, and that wonderful pumpkin pie spice. Don’t forget the light brown sugar – it adds a lovely warmth and depth that granulated sugar just can’t quite replicate. I like to pack it firmly when measuring for a richer flavor.
Now, grab your hand mixer and get to whipping! Start on low to combine everything, then crank it up to medium-high. You want to beat this mixture for at least 3-5 minutes. Seriously, set a timer. This step isn’t just about mixing; it’s about incorporating air, which is key to a light and fluffy cheesecake. The mixture will lighten in color, become noticeably smoother, and increase in volume. It should look like a rich, thick, creamy batter, almost like a frosting you could spread. If you don’t have a hand mixer, a strong whisk and some elbow grease will work, but it will take a bit longer. Just keep going until there are no visible lumps and the texture is truly uniform and airy. A quick taste test at this point will confirm that delicious fall flavor explosion!
2. Folding in the Whipped Topping and Assembling Your Easy Dessert
Once your pumpkin cream cheese base is perfectly fluffy and smooth, it’s time to bring in the secret weapon for that airy, light texture: thawed whipped topping. I recommend getting it out of the freezer when you take out your cream cheese so it’s perfectly defrosted when you need it. Gently add the thawed whipped topping to your pumpkin mixture. Now, here’s where you switch gears from vigorous whipping to gentle folding. Grab a rubber spatula and carefully fold the whipped topping into the pumpkin mixture. You want to do this delicately to maintain all that lovely air you just beat into the cream cheese.
Continue folding until the mixture is entirely smooth, creamy, and uniform in color – you shouldn’t see any streaks of plain white whipped topping. The consistency should be thick but still easily spreadable. It’ll be a beautiful pale orange color and smell incredible, a true sign of autumn. Once combined, carefully spoon this delightful filling into your pre-made graham cracker crust. Take your time to spread it evenly all the way to the edges, creating a smooth, inviting surface. I usually use the back of my spoon to gently press it down and ensure it’s perfectly flat. This makes for beautiful slices later! The best part? No oven needed, which means less heat in the kitchen and one less thing to worry about on a busy day. Just one quick assembly and you’re almost done.
3. The Chill Factor: Getting That Perfect Pumpkin No Bake Cheesecake Set
You’ve done the hardest part, which, let’s be honest, wasn’t very hard at all! Now comes the crucial step for any no-bake cheesecake: the chill time. This is where your beautiful, creamy filling transforms from a soft, spreadable mixture into a sliceable, firm cheesecake. Don’t skip this part, even if you’re tempted to dig in immediately (I’ve been there!). Place your pumpkin no bake cheesecake, uncovered or lightly covered with plastic wrap, into the refrigerator.
I recommend chilling for at least 3-4 hours, but honestly, if you can let it chill overnight, that’s ideal. The longer it chills, the firmer and more perfectly set your cheesecake will be, making it much easier to slice neatly without any messy crumbling. As it chills, the fats in the cream cheese solidify, and the mixture becomes beautifully dense yet still creamy. When it’s ready, the top will feel firm to the touch, and the edges will be well-defined against the crust. This is the moment when you can truly appreciate the no-fuss process. Slice it with a warm knife (run it under hot water and wipe dry between slices) for the cleanest cuts, and get ready to enjoy a perfectly set, deliciously spiced dessert that everyone will think took way more effort than it did!