
Opens in a new tab

Easy One Skillet Chicken Orzo for a Flavorful Weeknight Meal

TOTAL TIME
SERVES
COURSE
DIFFICULTY
Tested5× before publishing

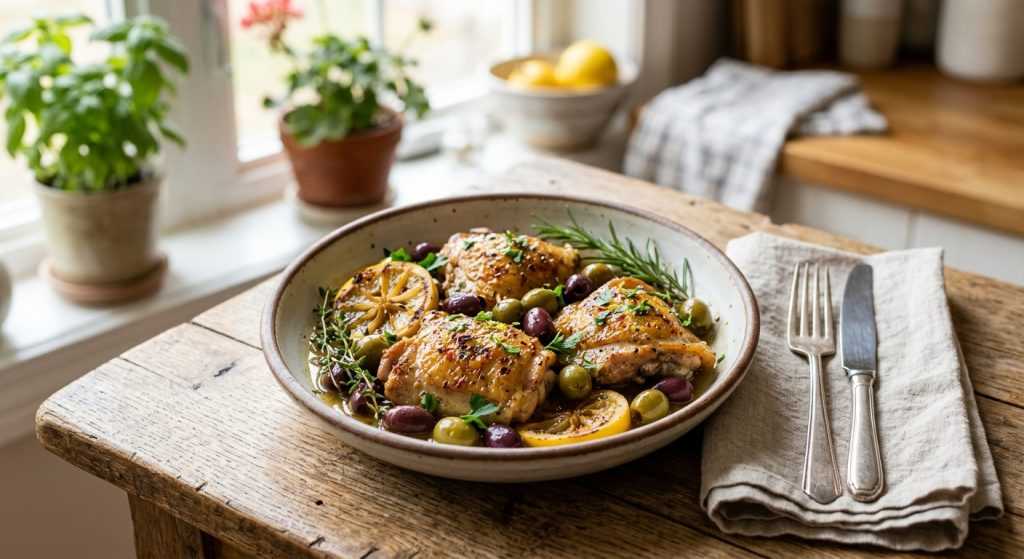
Okay, friends, I just made THE most amazing one skillet chicken orzo, and I immediately knew I had to share it with you. Seriously, it’s one of those recipes that feels fancy and impressive, but it’s actually super easy to pull off, even after a long day. If you’re looking for a meal that delivers big on flavor without leaving you with a mountain of dishes, then you’ve found your next go-to. I tested this recipe a few times to get it just right, and every time, it disappeared almost instantly!

The beauty of this dish is how everything comes together in a single pan. We’re talking crispy-skinned chicken thighs that are so tender they fall apart, nestled on a bed of creamy, nutty orzo pasta. The fresh fennel and leeks add a sweet, subtle crunch, and a hint of lemon just brightens everything up. It’s comforting, hearty, and yet still feels fresh. You’re going to love how little cleanup there is, too!

Getting That Perfect Crispy Skin on Your Chicken Thighs

Alright, let’s talk chicken. The secret to those perfectly juicy, tender chicken thighs with incredibly crispy skin in this one skillet chicken orzo recipe starts *before* they even hit the pan. Seriously, don’t skip the patting dry step! Take a few paper towels and really get those chicken pieces as dry as you possibly can. Any moisture on the skin will steam instead of sear, and we want glorious, shattering crispiness, not rubbery skin. Once they’re dry, a generous sprinkle of kosher salt and freshly ground pepper is all you need. Don’t be shy here; that seasoning makes all the difference.

Now, for the sear! Use an oven-safe skillet, a cast-iron one is truly your best friend for this kind of cooking. Heat two tablespoons of butter over medium-high heat until it’s shimmering. When you place the chicken thighs in, make sure they’re skin-side down and in a single layer. If your skillet is a little crowded, it’s okay to wait a minute or two for the chicken to shrink a tiny bit, then gently tuck in any remaining pieces. Don’t move them! Let that skin get cozy with the hot pan for a good 6-8 minutes. You’re looking for a deep, rich golden brown, almost mahogany color. The meat around the edges should start to look opaque. This step is where all that amazing flavor develops, so resist the urge to peek too early. Once they’ve got that gorgeous color, flip them over and pop the whole skillet into the oven to finish cooking. It’s so satisfying to see that golden skin!

Building Flavor with Fennel, Leeks, and Toasty Orzo

Once your beautiful chicken thighs are resting, it’s time to move on to the heart of our one skillet chicken orzo: the orzo! The best part? You’re using the same skillet, which means all those delicious browned bits from the chicken (what we call ‘fond’) get scraped up and become part of the orzo’s flavor profile. Keep that skillet on medium heat and toss in your chopped fennel bulb and leek. Remember to use only the white and pale green parts of the leek; the dark green parts are too tough for this. Give them a little sprinkle of salt and pepper and let them soften for about five minutes, stirring occasionally. You’ll notice the leeks start to get a lovely golden tint around the edges, and the whole kitchen will smell incredible. Fennel, when cooked, becomes wonderfully sweet and tender.

Next up, the orzo itself. Don’t just dump it in; we’re going to toast it! Add the dry orzo to the skillet with the softened veggies and cook it, stirring constantly, for about three minutes. You’ll see the little pasta grains start to turn a nutty brown in spots, and you’ll definitely smell that wonderful toasted grain aroma. This step adds a fantastic depth of flavor that a lot of recipes skip, but it’s totally worth it. Then, pour in the dry white wine. It might seem like a small amount, but it works wonders for deglazing the pan and adding a bright, acidic note. Stir it around until all that wine evaporates – it happens fast, usually within a minute. This locks in so much incredible flavor before we even get to the broth!

Achieving Creamy Orzo Perfection and Bringing It All Together

Now comes the fun part: making that orzo wonderfully creamy and tender! This is where you’ll gradually add your chicken broth, about half a cup at a time. The trick here is patience. Stir constantly, allowing the orzo to fully absorb each addition of broth before you pour in the next. This gentle, steady stirring helps release the starches from the pasta, which is what gives the orzo that lovely, risotto-like creaminess without actually being risotto! It’s super satisfying to watch the orzo plump up and transform right before your eyes. Keep going for about 10-15 minutes, or until the orzo is perfectly al dente – tender but still with a slight chew – and the pan isn’t dry, but most of the liquid is absorbed into a beautiful, creamy sauce. You want it to be saucy, not soupy, and definitely not sticky dry.

Once your orzo reaches that perfect consistency, take the skillet off the heat. This is your chance to taste and adjust! Add more salt and pepper if you think it needs it. Then, stir in the fresh lemon juice and the last tablespoon of unsalted butter. The lemon juice adds a zingy freshness that cuts through the richness, and that final pat of butter just melts into the orzo, making it extra luscious and glossy. Don’t forget those reserved fennel fronds! Chop them up and stir them in; they add a lovely, delicate anise flavor and a beautiful green pop. Finally, nestle those rested, crispy-skinned chicken thighs right back on top of your creamy orzo. A final sprinkle of fresh lemon zest over everything just before serving provides a burst of aroma and brightens the whole dish. Every bite is an absolute dream!

AD — Mediavine Content 300×250 / Responsive

Why This Recipe Works

This recipe works because it leverages the power of a single skillet to build incredible depth of flavor. Searing the chicken first creates a delicious fond (the browned bits at the bottom of the pan) that then infuses the orzo with rich flavor as it cooks. The gradual addition of broth and constant stirring makes the orzo wonderfully creamy, mimicking a risotto technique with minimal fuss. Plus, finishing with fresh lemon juice and zest brightens the entire dish, balancing the richness of the chicken and pasta.

"This one-skillet meal is exactly what you need on a busy night – juicy chicken, creamy orzo, and barely any cleanup!"— Charlotte
AD — Mediavine Native / 728×90 Leaderboard

Prep 15 minutesCook 40 minutesYield 4 servings
Ingredients
  •  Kosher salt, freshly ground black pepper
  • 6 skin-on, bone-in chicken thighs (about 2 pounds total), patted dry
  • 3 tablespoons unsalted butter, divided
  • 1 medium fennel bulb, chopped (reserve fronds for garnish)
  • 1 large leek, white and pale green parts only, chopped
  • 8 ounces orzo pasta
  • ⅓ cup dry white wine (like Sauvignon Blanc or Pinot Grigio)
  • 2½ cups low-sodium chicken broth, divided
  • 1 tablespoon fresh lemon juice
  • 1 teaspoon finely grated lemon zest
Instructions
  1. Sear the Chicken Preheat oven to 400°F. Pat the chicken thighs really dry with paper towels; this helps get that skin extra crispy! Generously season them all over with salt and pepper. Melt 2 tablespoons of butter in a large oven-safe skillet (cast iron works beautifully here!) over medium-high heat. Once hot, carefully place the chicken thighs, skin-side down, in a single layer. Cook for 6-8 minutes without moving them, until the skin is a deep golden brown and the meat looks opaque around the edges.
  2. Bake and Rest Flip the chicken thighs skin-side up. Transfer the skillet directly to the preheated oven and bake, uncovered, for 10-15 minutes, or until the chicken is cooked through and reaches an internal temperature of 170-175°F. Remove the skillet from the oven and transfer the cooked chicken to a clean plate. Cover loosely with foil to keep warm and let it rest while you finish the orzo.
  3. Build the Orzo Base Place the same skillet back on the stovetop over medium heat (no need to clean it!). Add the chopped fennel bulb and leek to the skillet. Season with a pinch of salt and pepper. Cook, tossing occasionally, for about 5 minutes, until the leek softens and gets a lovely golden color on the edges.
  4. Toast the Orzo Stir in the orzo pasta. Cook, stirring constantly, for about 3 minutes. The orzo will start to darken in spots and smell wonderfully toasty and nutty.
  5. Deglaze with Wine Pour in the dry white wine. Cook, stirring continuously, until all the liquid has evaporated, which usually takes about 1 minute.
  6. Simmer the Orzo Add the chicken broth ½ cup at a time, stirring constantly. Wait for the broth to be mostly absorbed by the orzo before adding the next ½ cup. Continue this process for 10-15 minutes, or until the orzo is tender and creamy, with most of the broth absorbed but still a little saucy – we don’t want it dry!
  7. Finish and Serve Remove the skillet from the heat. Taste the orzo and adjust seasonings with more salt and pepper if needed. Stir in the fresh lemon juice and the remaining 1 tablespoon of unsalted butter. Add the chopped fennel fronds and give it another good stir. Nestle the rested chicken thighs back on top of the orzo. Garnish with the finely grated lemon zest right before serving. Enjoy your delicious one-skillet meal!
Tested Tip

For the crispiest chicken skin, make sure your chicken thighs are bone-dry before seasoning and searing. Use paper towels to really blot away all moisture! Also, don't overcrowd the pan; sear in batches if needed.

AD — Mediavine Content 300×250 / Responsive

Getting That Perfect Crispy Skin on Your Chicken Thighs

Building Flavor with Fennel, Leeks, and Toasty Orzo

Achieving Creamy Orzo Perfection and Bringing It All Together

Make It Yours

  • Spice it Up — If you like a little heat, add a pinch of red pepper flakes when you're sautéing the fennel and leeks. It gives a subtle warmth that complements the lemon beautifully.
  • Add More Veggies — Feel free to toss in some spinach or kale during the last few minutes of orzo cooking. They'll wilt right into the creamy pasta, adding extra nutrients and color.
  • Herb Swap — Not a huge fan of fennel fronds? Fresh chopped parsley or dill would also be lovely stirred in at the end for a different fresh, herbaceous note.
  • Cheesy Finish — A sprinkle of grated Parmesan cheese over the top of the finished dish would add a wonderful savory, salty kick. Just a little bit goes a long way!
AD — Mediavine Content / Native

FAQ

Can I use boneless, skinless chicken thighs?

Yes, you absolutely can! The cooking time will be a bit shorter, around 8-12 minutes in the oven. You won't get that super crispy skin, but the flavor will still be delicious. Just sear them for 3-4 minutes per side, then bake until cooked through.

What if I don't have dry white wine?

No problem! You can substitute an equal amount of low-sodium chicken broth instead. The wine adds a nice depth, but the dish will still be fantastic without it. You could also use a tablespoon of apple cider vinegar for a similar acidic tang.

Can I make this ahead of time?

This dish is really best served fresh, as orzo can get a bit gummy if it sits too long. However, you can sear and bake the chicken ahead of time, then reheat it gently while you make the fresh orzo. Leftovers are still good for lunch the next day, just know the orzo texture might change slightly.

What kind of skillet should I use?

A cast-iron skillet (10-12 inches) is ideal because it retains heat so well and goes straight from stovetop to oven. If you don't have one, any oven-safe skillet will work, as long as it's large enough to hold all the chicken in a single layer.

AD — Mediavine 728×90 Leaderboard / Responsive

What To Serve With This

  • A simple green salad with a vinaigrette
  • Steamed green beans or asparagus
  • Crusty bread for soaking up the sauce
  • Roasted broccoli with garlic
  • Sautéed zucchini and cherry tomatoes

This post contains affiliate links. We may earn a small commission at no extra cost to you.

More Recipes You'll Love

Tested twice, weeknight-ready, family-approved.
