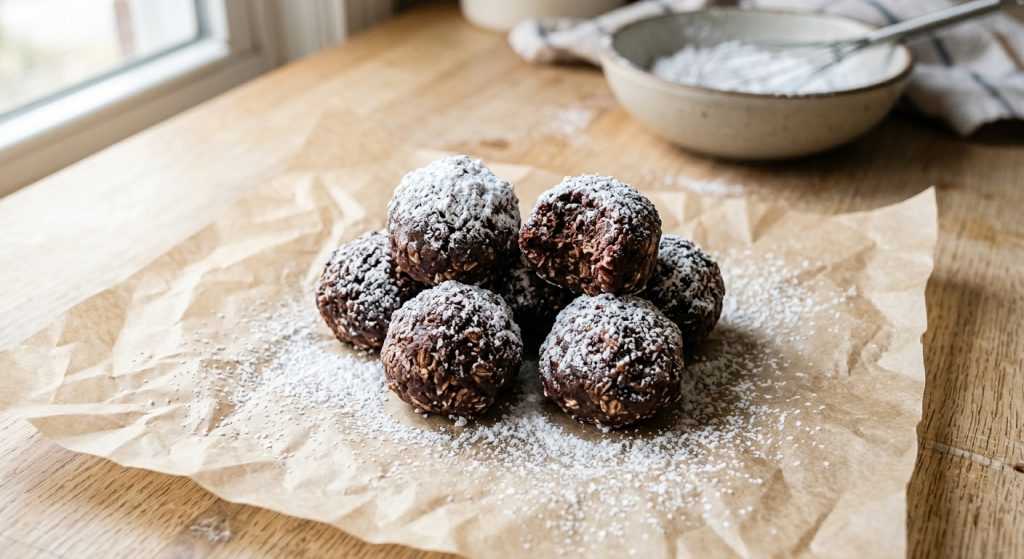
Okay, so who else needs a little something sweet that doesn’t take forever to make? I swear, some days I just want a quick pick-me-up, but opening the oven feels like a whole production. That’s why these **no bake fudgy snow balls** have become a total lifesaver around here. They hit that chocolate craving spot perfectly, and the best part is, you can whip them up in about 20 minutes.
I’ve made these so many times, perfecting the texture so they’re soft and chewy with a lovely richness from the cocoa and a nice subtle crunch from the almonds. The natural sweetness from the dates really shines through, and that powdered sugar coating makes them look super festive, like tiny snow-dusted treats. Seriously, these are perfect for when you need a little sweet bite without all the fuss, and they’re pretty good for the whole family too!
Whipping Up Your No Bake Fudgy Snow Balls: Getting the Texture Right
The first step, getting those almonds perfectly ground, is actually pretty important. You want them broken down well enough that they contribute to the texture without being chunky. Think of it like a coarse sand – not a fine flour, but definitely not big pieces. This helps create a smooth base for your dates to meld into. Pop them into your food processor and give them a few good pulses. You’ll see them transform from whole nuts to a crumbly mixture fairly quickly.
Once the almonds are sorted, the magic really happens with the dates. They’re what give these treats their incredible natural sweetness and that lovely, chewy, fudgy texture. Add your pitted dates, cocoa, honey, and initial water to the processor. You’ll process this mixture until it forms a thick, cohesive dough. It should look like a giant ball of dark, shiny dough, pulling away from the sides of the bowl. Don’t be afraid to scrape down the sides a few times to make sure everything gets incorporated. If it looks too dry and crumbly, almost like wet sand that won’t hold together, add water one teaspoon at a time. It’s better to add too little and slowly build up than to add too much and end up with a soupy mess. You’re looking for something that feels firm but pliable, like a well-worked play-doh.
The Secret to Easy Rolling: Damp Hands!
Now, let’s talk about rolling these little beauties. Dates are naturally very sticky, and if you try to roll this mixture with dry hands, you’ll end up with more dough on your palms than in your perfect little ball! The simple trick is to lightly dampen your hands with water. Just a quick rinse under the faucet, shake off the excess, and you’re good to go. You don’t want dripping wet hands, just slightly moist. This creates a barrier that prevents the mixture from sticking. I keep a little bowl of water next to my parchment paper so I can re-dampen as needed without trekking back and forth to the sink.
When you scoop out about a tablespoon of the mixture, gently roll it between your damp palms. Aim for a smooth, even shape. Don’t press too hard; a light, consistent pressure works best. The size is up to you, but a tablespoon scoop gives you a nice, bite-sized treat. As you roll, you’ll notice how much easier it is with those slightly wet hands. Place each finished ball on a sheet of parchment paper. This keeps them from sticking to your counter and makes them easy to move around once they’re all done. This is also a fun step to get little helpers involved, if their hands are clean and ready to get a little messy!
Getting That Snowy Finish and Storing Your Treats
The powdered sugar coating isn’t just for looks; it gives these no bake fudgy snow balls their charming name and adds a lovely soft sweetness that balances the rich cocoa. It also helps prevent them from sticking together, which is super helpful for storage. To get a nice, even coating, pour your powdered sugar into a shallow bowl – something wide enough to easily roll the balls around in. A cereal bowl or a small serving dish works great. I find it easiest to roll one ball at a time. Just drop it in the sugar, gently swirl the bowl, and use your fingertips to nudge it around until it’s fully coated.
Once coated, I like to give each ball another quick, gentle roll in my hands to help press the sugar on a little, making sure it really adheres. This also helps smooth out any stray sugar crystals. Then, back onto the parchment paper they go. You can enjoy these right away, but I actually prefer them slightly chilled. Pop them in the fridge for about 15-30 minutes, and they firm up just a touch, making them even chewier and more satisfying. For storage, an airtight container in the refrigerator will keep them fresh and delicious for up to a week. They’re such a convenient grab-and-go snack or a quick dessert after a busy day!