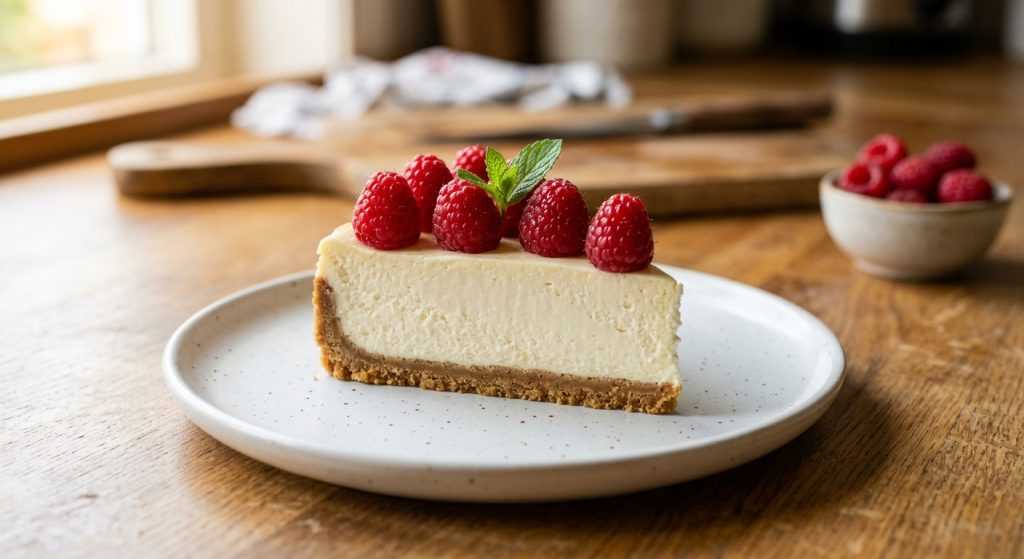
Okay, friends, let me tell you about this easy no bake cheesecake. Seriously, if you need a dessert that feels special but takes practically no time, this is it. I’ve made this more times than I can count when I’m short on time but still want something sweet to share. It’s truly one of those recipes you’ll keep in your back pocket for potlucks, last-minute gatherings, or just a Tuesday night when you deserve a little something extra.
The beauty of a no-bake recipe is right there in the name – no oven! That means less heat in your kitchen, which is a win, especially in warmer months. The texture is light and airy, almost like a mousse, but still has that classic cheesecake tang. It’s cool, creamy, and just melts in your mouth. This recipe is super simple, using just a few common ingredients, and comes together faster than you can say “dessert first.”
The Best Start for Your Easy No Bake Cheesecake
When you’re making this easy no bake cheesecake, the very first step, getting your cream cheese ready, truly sets the stage for the whole dessert. Seriously, don’t skip letting it soften! If your cream cheese is cold and stiff, you’ll end up with little lumps in your mixture, and nobody wants a lumpy cheesecake. I usually pull mine out of the fridge about 30 minutes before I plan to start, or if I’m really pressed for time, a quick 10-15 second zap in the microwave can help. You just want it pliable, not melted. Once it’s softened, combine it with your sweetener of choice and that little bit of fresh lemon juice. The lemon is subtle but so important – it adds that signature tangy brightness that keeps cheesecake from being too sweet and heavy. It’s a small detail that makes a big difference in the finished flavor. Then, get out your electric mixer and whip away! You’re looking for that cream cheese mixture to transform, becoming visibly lighter in color and incredibly fluffy. This whipping action incorporates air, which contributes to the airy, delicate texture of the final cheesecake. Keep at it for a good 2-3 minutes, scraping down the bowl as needed, until it’s completely smooth.
You’ll know it’s ready when it looks almost like a very thick, airy frosting. Any tiny bits of unmixed cream cheese will stand out, so keep an eye out for those. A smooth base means a smooth finished product, and that’s exactly what we’re aiming for with this simple recipe. This step is about more than just mixing; it’s about creating the right consistency and texture right from the beginning, ensuring every bite of your no-bake treat is uniform and delightful. It really only takes a few extra minutes but prevents so much frustration later on. A well-whipped cream cheese base holds everything together beautifully once the whipped topping is folded in.
Achieving That Perfect Light & Fluffy Texture
Once your cream cheese mixture is perfectly light and fluffy, it’s time to bring in the whipped topping. This is where the “no-bake” magic truly happens, giving the cheesecake its structure and an incredibly airy, almost mousse-like consistency without any baking. The key here is gentle folding. You’ve just worked hard to incorporate air into that cream cheese, and you don’t want to undo all that effort by aggressively stirring. Think of it like folding egg whites into a batter – you want to combine everything without deflating the air. I use a rubber spatula for this, scooping from the bottom of the bowl and folding it over the top, rotating the bowl as I go. Continue this delicate motion until you see no more streaks of white whipped topping and the mixture is uniformly smooth and pale.
It’s okay if it feels a little loose at this stage; it will firm up wonderfully in the fridge. What you’re looking for is a consistent, dreamy texture. When you scoop a spoonful, it should feel light and cloud-like. If you overmix, you risk making the cheesecake dense, losing that lovely, delicate melt-in-your-mouth quality that makes this recipe so special. Take your time, enjoy the process, and watch as your simple ingredients transform into something truly delectable. This step is quicker than you might think, just a couple of minutes of careful folding, and then you’re practically done with the active prep. It’s almost impossible to mess this up if you remember to be gentle!
The Essential Chill: Why It Matters
Now for the hardest part of any no-bake dessert: the waiting! Once you’ve gently spooned your beautiful, creamy mixture into the graham cracker crust and smoothed out the top, it’s time for the refrigerator to do its work. Covering it loosely with plastic wrap before chilling is a good idea to prevent any weird fridge odors from getting into your dessert, and it also helps keep the surface from drying out. While 3 hours is the minimum recommended chilling time, I’m going to be honest with you: for the best results, I really prefer to let this cheesecake chill for at least 6 hours, or even better, overnight. That longer chill time makes all the difference in achieving a firm, sliceable cheesecake that holds its shape perfectly when you cut into it.
When it’s properly chilled, the cheesecake will feel firm to the touch, and you’ll be able to get clean, beautiful slices. If you try to cut it too soon, it might be a bit soft and messy, which is totally fine if you don’t mind a slightly less structured slice, but for that classic cheesecake presentation, patience really pays off here. The cold also allows all those simple flavors to meld together even more beautifully, creating a more cohesive and delicious taste. So, put it in the fridge, set a timer, and resist the urge to peek too often! You’ll be rewarded with a truly delightful and surprisingly elegant dessert that everyone will enjoy, especially since you didn’t even have to turn on the oven.