Easy Chicken Enchilada Casserole for Busy Weeknights

TOTAL TIME
SERVES
COURSE
DIFFICULTY
Tested5× before publishing

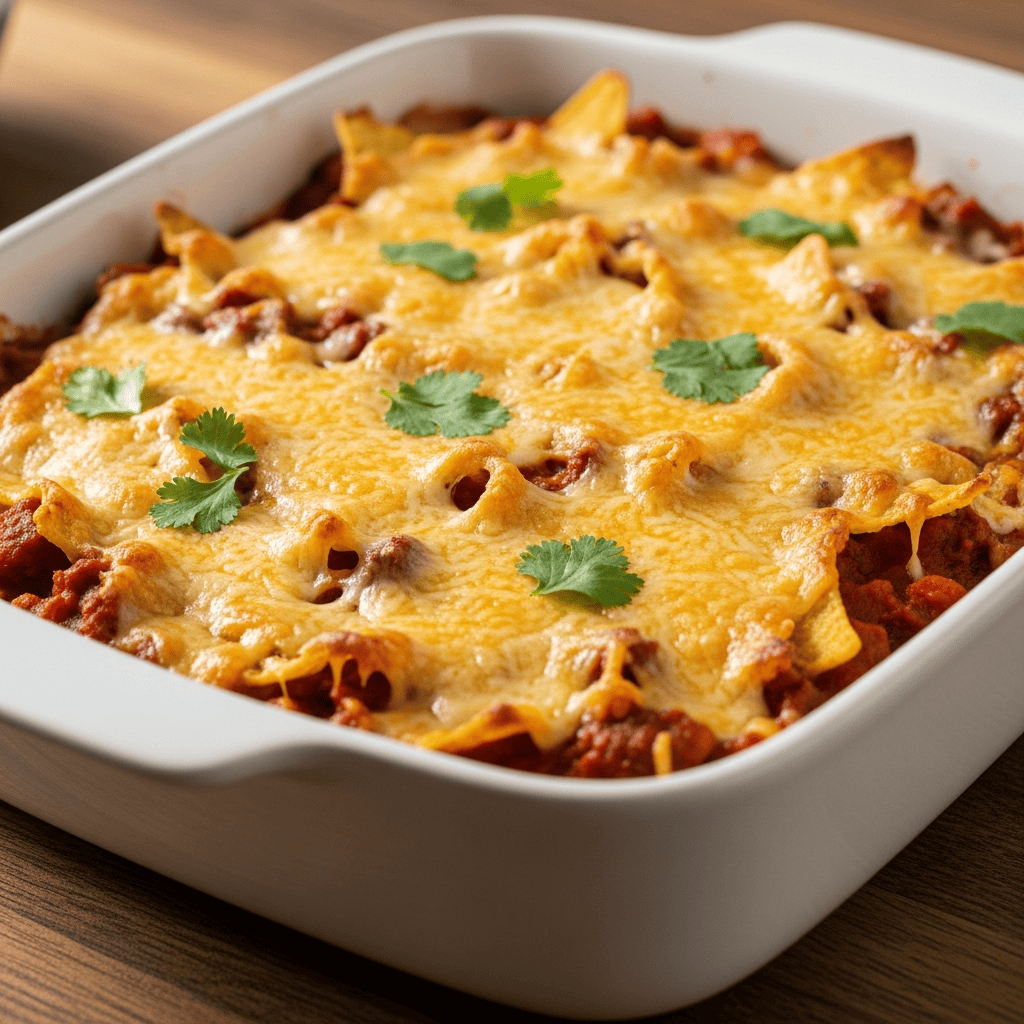
So, you know how some nights you just need something comforting and delicious on the table, but also, like, *fast*? This chicken enchilada casserole is exactly that kind of meal. It’s hearty, cheesy, and packed with flavor, making it a total winner when you’re short on time but still want to feel like you cooked a proper meal. I’ve made this more times than I can count, always tweaking it to be as simple as possible without sacrificing any of the yummy taste.

Seriously, if you’re looking for something that tastes like it took hours but only requires a few minutes of active prep, this is it. It’s perfect for the whole family and so easy to pull together on a busy Tuesday or even for a relaxed Sunday dinner. Plus, it uses ingredients you probably already have or can grab quickly. Get ready for some serious comfort food!

Getting Ready for Your Chicken Enchilada Casserole

Prepping ahead is seriously the biggest time-saver for this chicken enchilada casserole. If you can, shred your chicken a day or two before you plan to make this. Rotisserie chicken is a lifesaver here – just grab one from the grocery store, shred it, and you’re halfway there. I also like to get all my cans opened and beans rinsed before I even start cooking the onions. It just makes the whole process feel so much smoother and less chaotic, especially if you’ve got little ones running around.

Don’t skip mixing those spices together first! It ensures every bit of chicken gets coated evenly. And if your chicken isn’t pre-seasoned, a little salt and pepper before it goes into the skillet makes a big difference. These small steps really do add up to a much more relaxed cooking experience.

Layering Tips for the Best Results

The layering might seem a bit specific, but it helps keep everything together and ensures every bite has a good mix of flavors and textures. When you cut the tortillas in half, those flat edges are perfect for lining the casserole dish. It creates a solid base and sides, kind of like an edible wall, which is especially helpful if you’re using corn tortillas that can sometimes be a bit more fragile. Don’t worry if it’s not perfectly precise, a little overlap is totally fine!

Make sure you spread that first thin layer of enchilada sauce on the bottom of the dish. It helps prevent the tortillas from sticking and adds moisture from the get-go. And when you’re adding the chicken filling, try to spread it as evenly as possible. You want a consistent flavor distribution throughout the whole dish, so every serving is equally amazing. Even distribution of the sauce and cheese layers is key too, it makes for that perfect melty, saucy goodness when it comes out of the oven.

Making This Casserole a Weeknight Win

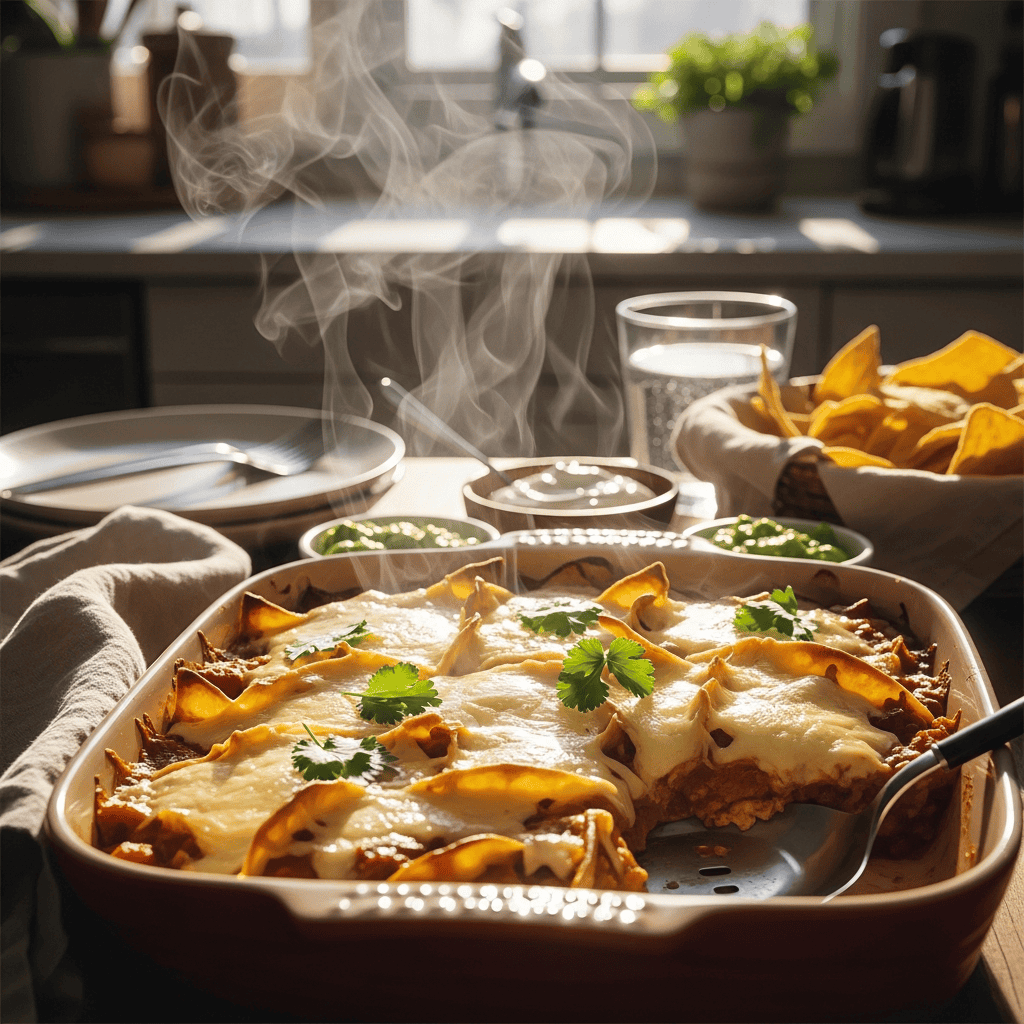
This easy chicken enchilada casserole is designed for busy weeknights, so lean into the convenience! Using good quality store-bought red enchilada sauce is perfectly fine, or if you have a favorite homemade version, even better. The hot sauce and honey are optional, but I find they really balance out the flavors – the hot sauce adds a subtle kick, and the honey just rounds out the savory notes without making it sweet. Adjust them to your family’s taste!

Once it’s baked, let it rest for just 5-10 minutes before you cut into it. This waiting period is hard, I know! But it allows the layers to set a bit, making it easier to serve and preventing it from falling apart. Trust me, it’s worth the short wait for those clean, cheesy slices. And don’t forget the garnishes! Fresh cilantro, a dollop of sour cream, and some crunchy tortilla chips really complete the meal. It turns a simple casserole into something really special!

AD — Mediavine Content 300×250 / Responsive

Why This Recipe Works

This dish works so well because it layers familiar, comforting flavors in a way that feels special but takes hardly any effort. The tortillas soak up just enough of the savory red enchilada sauce, and that generous amount of melty cheese holds everything together. It’s a complete meal in one dish, full of satisfying textures and a lovely balance of spice and tang from the lime and optional hot sauce. Plus, it reheats beautifully for leftovers!

This chicken enchilada casserole is comfort food on a dish, especially when you need dinner to just *happen*.— Charlotte
AD — Mediavine Native / 728×90 Leaderboard

Prep 15 minutesCook 35 minutesYield 8 servings
Ingredients
  • ½ teaspoon onion powder
  • ½ teaspoon garlic powder
  • ½ teaspoon cumin
  • ½ teaspoon paprika
  • ½ teaspoon dried oregano
  • ½ teaspoon chili powder
  • 1-2 tablespoons avocado oil (or olive oil)
  • ½ yellow onion, diced
  • 20 oz. red enchilada sauce (store-bought or homemade)
  • 3 cups shredded cooked chicken (rotisserie works great!)
  • To taste salt and pepper
  • 3 cloves garlic, minced
  • 1 (15 oz.) can black beans, drained and rinsed
  • 1 (4 oz.) can diced green chiles, undrained
  • 2 tablespoons lime juice
  • 1 teaspoon hot sauce (optional, adjust to taste)
  • 1 teaspoon honey (optional, balances flavors)
  • 2 tablespoons finely chopped cilantro, plus more for garnish
  • 8 (6-inch) flour or corn tortillas
  • 3 ½ cups shredded Mexican cheese blend, divided
  • For serving sour cream
  • For serving tortilla chips
  • Optional garnishes diced tomatoes, avocados, jalapeños, red onions
Instructions
  1. Prep Your Oven & Ingredients First things first, get your oven heating up to 350° F. While that’s happening, grab a small bowl and mix together all your seasonings: onion powder, garlic powder, cumin, paprika, dried oregano, and chili powder. Set that aside. Make sure your chicken is already shredded and seasoned if needed (rotisserie chicken usually has enough salt already). Measure out all your other ingredients so they’re ready to go!
  2. Sauté the Aromatics Pour the avocado or olive oil into a large skillet and heat it over medium heat. Add your diced yellow onion and let it soften for about 5 minutes, stirring occasionally. Then, toss in the minced garlic and cook for just 1 more minute until it smells amazing.
  3. Create the Flavorful Filling Reduce the heat to medium-low. Add your shredded cooked chicken to the skillet along with the seasoning mix you prepared earlier. Toss everything together until the chicken is well coated. Now, stir in the drained black beans, diced green chiles (undrained), fresh lime juice, hot sauce (if you’re using it!), and a little honey. Stir in the chopped cilantro and let it all heat through for 1 to 2 minutes. Remove the skillet from the heat and set your delicious filling aside.
  4. Assemble the First Layer Grab your 9x13-inch casserole dish. Spread about ¼ cup of the red enchilada sauce across the bottom – it’ll be a thin layer, just enough to cover. Now, cut each tortilla in half. Arrange 6 of these tortilla halves around the edges of your dish, with the flat edges against the dish walls. Place the remaining 2 halves in the middle to cover any gaps.
  5. Layer Up the Goodness Spoon half of your chicken filling mixture evenly over the tortillas. Drizzle 1 cup of the enchilada sauce over the filling, then sprinkle 1 ½ cups of shredded Mexican cheese on top. Repeat this layering: another layer of tortillas (6 halves around the edges, 2 in the middle), the remaining chicken mixture, another 1 cup of enchilada sauce, and finally, the rest of the shredded cheese.
  6. Bake to Cheesy Perfection Cover your casserole dish with foil and pop it into your preheated oven. Bake for 15 minutes. After that, carefully remove the foil and bake for another 15 minutes, or until the cheese is beautifully melted and bubbly. The edges might get a little golden, which is exactly what we want!
  7. Garnish and Serve Once it’s out of the oven, let it sit for a few minutes before slicing. Garnish with fresh cilantro and any other desired toppings like diced tomatoes, avocados, jalapeños, or red onions. Serve warm with a dollop of sour cream and some tortilla chips for scooping up any extra deliciousness. Enjoy!
Tested Tip

My best tip for this recipe is to make good use of a pre-cooked rotisserie chicken. Shredding it ahead of time makes assembling this casserole so much faster. I usually do it while dinner is cooking the night before, or even earlier in the week, so it's ready to go when I need it!

AD — Mediavine Content 300×250 / Responsive

Getting Ready for Your Chicken Enchilada Casserole

Layering Tips for the Best Results

Making This Casserole a Weeknight Win

Make It Yours

  • Extra Kick — If you love a little more heat, don't hold back on the hot sauce! You can also add some diced fresh jalapeños to the chicken filling or sprinkle them on top before baking.
  • Add More Veggies — Stir in a can of drained corn, some diced bell peppers, or even a handful of spinach to the chicken mixture for added nutrients and color. Sauté bell peppers with the onion for extra tenderness.
  • Protein Swap — Not a chicken fan? You can easily swap the shredded chicken for cooked ground beef or turkey. Just brown and season the meat before adding it to the skillet with the other filling ingredients.
  • Cheese Please! — While Mexican cheese blend is great, feel free to experiment with other cheeses. Monterey Jack, cheddar, or even a little queso fresco crumbled on top would be delicious.
AD — Mediavine Content / Native

FAQ

Can I use corn tortillas instead of flour?

Absolutely! Corn tortillas work wonderfully in this recipe. Just make sure to cut them in half just like the flour tortillas. Some people prefer lightly frying them first to make them more pliable, but it's not strictly necessary for a casserole.

Can I make this chicken enchilada casserole ahead of time?

Yes! You can assemble the entire casserole, cover it tightly, and refrigerate it for up to 24 hours before baking. When ready to bake, you might need to add an extra 5-10 minutes to the covered baking time since it will be chilled.

How do I store leftovers?

Store any leftover casserole in an airtight container in the refrigerator for up to 3-4 days. It reheats really well in the microwave or oven.

Can this casserole be frozen?

Yes, it freezes well! Assemble the casserole (without baking), cover it tightly with plastic wrap and then foil, and freeze for up to 2-3 months. Thaw overnight in the refrigerator before baking as directed, potentially adding a little extra baking time.

AD — Mediavine 728×90 Leaderboard / Responsive

This post contains affiliate links. We may earn a small commission at no extra cost to you.

More Recipes You'll Love

Tested twice, weeknight-ready, family-approved.