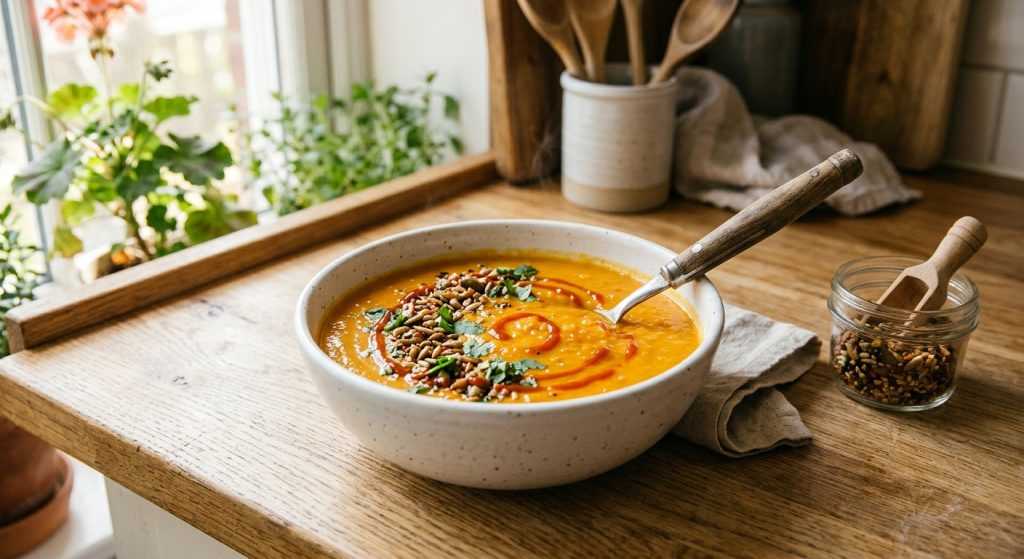
Hey friend! Today I’m so excited to share my go-to recipe for a truly comforting and easy creamy carrot ginger soup. As a busy parent, sometimes you just need a meal that tastes amazing, is packed with good-for-you ingredients, and doesn’t require a culinary degree or hours in the kitchen. This soup checks every single one of those boxes, and I’ve made it countless times, tweaking it until it was just right.
This recipe offers two methods: a classic stovetop version that’s wonderful for a relaxed afternoon, and an Instant Pot option for those crazy weeknights when you need dinner on the table, like, five minutes ago. Both ways create a vibrant, warming bowl that’s perfect for the whole family, even if you have a picky eater in the house. The flavors here are so balanced, with that sweet carrot base brightened by fresh ginger and a hint of spice. You’re going to love it!
Prep for the Perfect Puree: Getting Started with Your Carrots & Aromatics
Alright, let’s get those veggies ready! For this creamy carrot ginger soup, the main star is, of course, the carrots. You’ll want two pounds of them, scrubbed clean. Whether you peel them or not is totally up to you – I often skip peeling for a little extra fiber and color, especially if they’re organic. Just make sure they’re well-washed. Cut your carrots into ½-inch pieces; consistency here is key so they all cook evenly. Next up, dice your medium-large white or yellow onion. It doesn’t have to be perfect since it’s all getting blended, but smaller pieces will soften faster.
Now for the aromatics that give this soup its incredible depth: fresh ginger and garlic. Take about a tablespoon of fresh ginger and mince it finely. I usually just scrape the skin off with a spoon – it’s super easy! Then, mince three cloves of garlic. You can use a microplane for both the ginger and garlic if you want to make quick work of it. Having everything prepped and ready before you start cooking (that’s called mise en place!) really helps keep the process smooth and stress-free, especially when you’re juggling dinner and a busy household. These initial steps are where all the foundational flavors start to build, creating a wonderful base for our creamy soup.
Stovetop Simplicity: Cooking Your Velvety Creamy Carrot Ginger Soup
If you’re going the stovetop route, grab a nice big pot or a Dutch oven. Start by heating your oil over medium heat. Once it’s shimmering, toss in your chopped carrots and diced onion. This first sauté step is important because it really coaxes out the natural sweetness from the carrots and softens the onion, building a flavorful base. Keep stirring them around for about 5 to 7 minutes until the onions are soft and clear, and the carrots are beginning to get tender. You’ll notice the edges of the carrots might even start to look a little golden.
Next, add in your minced ginger, garlic, the initial ¾ teaspoon of sea salt, and those optional red pepper flakes. Stir them in and cook for just another minute or two. You’ll know it’s ready when your kitchen starts to smell absolutely amazing – that sweet, pungent aroma of fresh ginger and garlic is truly something! Pour in the vegetable broth and bring everything to a simmer. Once it’s bubbling gently, pop a lid on, turn the heat down to low, and let it cook for 15-20 minutes. You want those carrots to be really, truly soft. Test them with a fork; they should easily mash. This ensures your soup will blend up perfectly smooth. Finish by stirring in the coconut milk and blending until velvety. Don’t forget to taste and adjust the salt!
Instant Pot Express: Quick & Easy Soup for Busy Nights
For those nights when time is truly of the essence, the Instant Pot is your best friend for this creamy carrot ginger soup. Hit the ‘Sauté’ button on your Instant Pot and let the inner pot heat up. Once it’s hot, add your oil, carrots, and diced onion. Sauté them for 5-7 minutes, stirring occasionally. Just like on the stovetop, this step is all about building flavor by softening the vegetables and bringing out their natural sugars. You’ll see the onions turn translucent and the carrots will start to lose their raw edge.
Now, toss in the minced ginger, garlic, the initial ¾ teaspoon of sea salt, and the optional red pepper flakes. Give it another quick stir and let it cook for just a minute or two until those wonderful aromas waft up. Press ‘Cancel’ to turn off the sauté function. Pour in the vegetable broth, then secure the lid, making sure the sealing valve is set. Set it to ‘Pressure Cook’ on HIGH for just 5 minutes. The magic of the Instant Pot means those carrots will be perfectly tender in no time! Once the 5 minutes are up, let the pressure release naturally for about 25 minutes. This step is important for safety, but it also allows the flavors to deepen and prevents the soup from frothing too much when you open it. After the valve drops, remove the lid, stir in the light coconut milk, and blend until smooth with an immersion blender. Season to perfection and enjoy!
Sweet & Spicy Crunch: Whipping Up the Seed Topping
While the soup itself is fantastic, adding this sweet and spicy seed topping takes it to a whole new level of texture and flavor! It’s totally optional, but I highly recommend it for that extra little something. First, get your oven preheating to 350°F and line a small baking sheet with parchment paper. In a small bowl, combine your raw pumpkin seeds (also known as pepitas), raw sunflower seeds, maple syrup, curry powder, cayenne pepper, and ¼ teaspoon of sea salt. Give everything a really good stir until all the seeds are evenly coated in that sticky, spicy mixture. Feel free to taste a tiny bit and adjust the cayenne if you like things spicier – I usually go for the full amount because I love a little kick!
Spread the coated seeds out onto your prepared baking sheet in a single layer. You want them to be touching so they can form those nice little clusters. Bake them for 10-12 minutes, making sure to give them a toss halfway through. This helps them toast evenly and prevents burning. You’re looking for them to be lightly golden brown. Once they’re out of the oven, let them cool on the baking sheet for 5-10 minutes. As they cool, they’ll start to firm up and stick together, which is exactly what we want for those lovely crunchy clumps. Break them apart and let them cool completely before storing them in an airtight container. They’re great for adding crunch to salads, too!