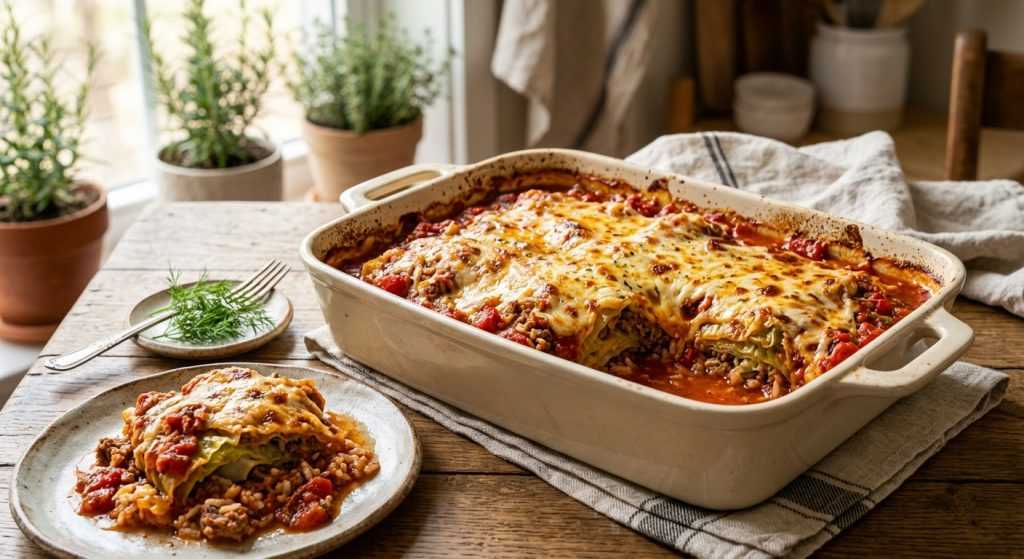
Hey friends! I just had to tell you about this incredible dinner I whipped up last night – a super easy cabbage roll casserole that has quickly become a new favorite. Seriously, who has time to roll individual cabbage leaves when you’ve got a thousand other things going on? Not me! This recipe takes all those delicious, cozy flavors of traditional cabbage rolls and stacks them into a hearty, satisfying bake. It’s comforting, full of flavor, and honestly, a total win for getting a wholesome meal on the table without all the fuss.
I know we’re all looking for those magic recipes that feel special but don’t demand hours in the kitchen, and this one fits the bill perfectly. I’ve tweaked and tested this version until it’s just right – the meat sauce is rich and savory, the cabbage is tender, and the rice absorbs all that amazing flavor without getting mushy. Plus, it’s a wonderful way to get some extra veggies in for the whole family. Prepare for your house to smell absolutely amazing!
Getting Started: The Secret to a Perfect Cabbage Roll Casserole
Okay, let’s talk about that amazing meat sauce. This is really where the magic begins for our cabbage roll casserole. First up, you’ll want to get your dill and garlic ready. Finely chopping fresh dill makes such a difference, giving a bright, herbaceous note that’s just lovely. And fresh garlic? Always a winner! Mix a portion of these with your ground beef, salt, and pepper. Getting your hands in there and really combining everything ensures every bite of meat is seasoned.
Then comes the browning. Don’t rush this step! You want to achieve a really deep, beautiful brown on your beef. Those little caramelized bits stuck to the bottom of your Dutch oven? That’s pure flavor building right there. Work in batches to avoid overcrowding the pan, which would steam the meat instead of browning it. Once your beef is happily browned and set aside, it’s time to soften those onions. Cooking them slowly until golden brings out their natural sweetness, creating a fantastic base. Adding the crushed red pepper flakes and a touch of cinnamon might seem a little unexpected, but it adds a subtle warmth and depth that truly makes the sauce special, rounding out the savory notes without being overpowering. This aromatic blend, combined with the reserved garlic, creates a super fragrant foundation.
Now, for the tomatoes! Once the beef is back in the pot, add your can of whole peeled tomatoes. Break them up with your spoon, then add a little water and let it all simmer. This reduction step is CRUCIAL. You want the sauce to thicken significantly, becoming rich and concentrated, almost like a tomato paste in consistency. This intense flavor ensures every layer of your casserole is packed with taste, and it helps prevent the final dish from being watery. It might take about 20-25 minutes, but the wait is totally worth it for that incredible, robust sauce.
Prepping Your Cabbage and Rice Like a Pro
Next up, let’s tackle the cabbage and rice – two key players in our casserole. For the cabbage, you’ll start by carefully removing the core, which makes it much easier to pull off those big, beautiful leaves without tearing them. You’re aiming for about 16-20 good-sized leaves. Don’t worry if you tear a couple; we’re layering, not rolling, so it’s pretty forgiving! A little trick I learned is to cut a small V-shape at the bottom of each leaf to remove that super thick, fibrous stalk. This makes the leaves much more tender and easier to work with.
Once your leaves are prepped, it’s time for a quick dip in boiling salted water. We’re not cooking them fully, just blanching them for about 10-15 seconds per batch until they’re pliable. This softens them just enough so they’ll lay flat nicely in the baking dish and become wonderfully tender during baking, without turning to mush. After their hot bath, immediately transfer them to a baking sheet lined with paper towels and give them a good pat-down. We want those leaves dry! Excess moisture can make your casserole watery, and nobody wants a soggy bottom.
For the rice, we’re going to par-cook it. This means boiling it until it’s barely al dente – think of it like pasta that’s still got a bite to it, maybe 5 minutes tops. The goal here is to give it a head start, so it finishes cooking perfectly in the casserole, absorbing all those delicious sauce flavors without overcooking or getting gummy. After cooking, drain it and give it a quick rinse under cold water. This stops the cooking process and washes away any extra starch, helping to keep it fluffy. Shake it really well to get rid of as much water as possible. Then, for a bright, fresh twist, stir in some finely grated lemon zest and the rest of that fresh dill. That little pop of citrus and herb really brightens up the whole dish!
Layering It Up for Casserole Success
Alright, you’ve done all the prep work, and now comes the fun part: layering! This is where our casserole truly starts to take shape. Begin by lightly oiling your 9×13-inch baking dish. This helps prevent sticking and adds a little extra richness to the bottom layer. Then, arrange your first layer of blanched cabbage leaves across the bottom. Don’t be afraid to overlap them a bit; we’re creating a solid foundation, just like you would with lasagna noodles. The goal is to cover the entire bottom of the dish so that every part of the casserole gets some tender cabbage action.
Next, grab that amazing meat sauce we worked so hard on. Before you go spreading it all, remember to scoop out about half a cup and set it aside. This little bit will be dolloped on top later for a pretty finish and an extra burst of flavor. Now, take half of the remaining sauce and spread it evenly over your cabbage layer. You want a generous, consistent layer of that savory goodness. Then, evenly sprinkle half of your lemon-dill rice mixture over the sauce. The rice will gently cook in the sauce, soaking up all the flavors as it bakes, so make sure it’s spread out well.
Repeat these layers: another blanket of cabbage leaves, followed by the rest of the meat sauce, and then the remaining rice. Finish it all off with a final, neat layer of cabbage leaves on top. It should look like a beautiful, rustic pie by now, full of promise! The key is to keep your layers fairly even. This layering technique is what gives you all those distinct, yet beautifully blended, flavors and textures in every forkful. It’s so much easier than rolling and just as delicious!
The Grand Finale: Baking to Golden Perfection
Now for the luscious top layer and the final bake! Once your casserole is all layered up, it’s time to add that creamy finish. Spread the crème fraîche evenly over the final layer of cabbage. Crème fraîche is wonderfully rich and adds a lovely tangy note that cuts through the savory meat and sweet cabbage. If you don’t have crème fraîche, a good quality sour cream would work in a pinch for a similar creamy, tangy effect. Then, take that reserved half-cup of meat sauce and dollop it artfully over the crème fraîche. This not only looks pretty, creating little bursts of red, but also adds another layer of concentrated flavor right on top.
Next, comes the mozzarella! Grate your low-moisture mozzarella using the large holes of a box grater and sprinkle it generously over the entire casserole. We want a good, even layer for that classic golden, bubbly cheese crust. Cover your baking dish tightly with aluminum foil. I always recommend placing the covered dish on a large rimmed baking sheet before it goes into the oven. Just in case anything decides to bubble over, it saves you from a messy oven clean-up later!
Bake the covered casserole for 20 minutes at 400°F. This initial covered bake allows all the flavors to meld beautifully and the rice to finish cooking gently in the steamy environment. After 20 minutes, pull off the foil and crank up your oven temperature to 425°F. Now we’re going for that glorious browned top! Let it bake for another 18-20 minutes, or until the cheese is wonderfully golden and bubbling like crazy. Seriously, the smell alone will make your mouth water! Once it’s out of the oven, it’s really important to let it cool for at least 10 minutes before you slice into it. This resting time lets all those layers settle and firm up, making it much easier to serve neat, beautiful portions. Enjoy your cozy masterpiece!