If you’re looking for a quick and truly delicious dinner, these air fryer turkey cutlets are about to become your new favorite! Seriously, weeknights can be a whirlwind, and sometimes just thinking about what to cook feels like a whole extra job. That’s why I’m always on the hunt for recipes that deliver big on flavor without demanding a ton of my time or attention. And let me tell you, this one totally fits the bill. It’s perfect when you want something satisfying but need to get it on the table fast.
I’ve made these cutlets so many times now, tweaking little things to make sure they come out perfectly crispy on the outside and wonderfully juicy on the inside every single time. Using stuffing mix for the coating is pure genius – it adds so much flavor and texture with almost no effort. You’ll be amazed at how quickly these come together, and how much everyone at the table enjoys them. Get ready to add this to your regular rotation, because it’s a total winner!
Getting Your Air Fryer Turkey Cutlets Ready for Breading
Alright, let’s talk prep! The beauty of this recipe starts right here with how quickly you can get everything set up. First things first, get that air fryer heating up to 400°F. Seriously, preheating is a non-negotiable step for achieving that perfect crispy exterior we’re aiming for. While that’s warming up, you’ll tackle the stuffing mix. Instead of using it as is, we’re going to give it a little zhuzh in the food processor. You want to pulse it until it resembles coarse bread crumbs, not fine dust. This gives the turkey a fantastic textured coating that really holds up.
Think about setting up a little assembly line on your counter. One shallow dish for the finely crushed stuffing mix, and another for the buttermilk. This keeps things tidy and makes the breading process super efficient. I love using a pie plate for the crumbs and a soup plate for the buttermilk because their wide, flat surfaces make it easy to coat the cutlets evenly. If you don’t have a food processor, no worries! You can put the stuffing mix in a sturdy plastic bag and crush it with a rolling pin. It takes a little more muscle, but it absolutely works. Having everything ready to go before you touch the raw turkey makes the whole process smooth and stress-free.
The Secret to a Perfect Crispy Coating on Your Turkey Cutlets
Now for the fun part: breading! This is where those turkey cutlets transform from plain to perfectly ready for their air fryer moment. The buttermilk is crucial here; it acts as a binder, helping the stuffing crumbs really stick to the turkey. Plus, it adds a subtle tang and helps tenderize the meat, making the finished cutlets extra juicy. When you dip each cutlet in the buttermilk, make sure it’s fully coated on both sides, then let any excess drip off before moving it to the crumbs. You don’t want it soaking wet, just nicely moistened.
Once it’s in the stuffing mix, gently press the crumbs onto the turkey. Don’t just roll it; really press and pat to make sure you get a generous, even coating all over. This creates that wonderfully thick, flavorful crust. Set your breaded cutlets aside on a clean surface, like a cutting board covered with parchment paper. When all four are breaded, it’s time for the magic ingredient: nonstick cooking spray. Give both sides a good, even spray. This isn’t just for preventing sticking; it helps the coating get that gorgeous golden-brown color and incredible crunch that makes these air fryer turkey cutlets so irresistible. Don’t skimp on this step – it really makes a difference!
Air Frying for Crispy, Juicy Perfection
Okay, the air fryer is hot, the cutlets are beautifully breaded and sprayed – now it’s showtime! Carefully place your cutlets in the air fryer basket in a single layer. This is super important: overcrowding your air fryer is the quickest way to end up with steamed, sad cutlets instead of crispy, happy ones. If your air fryer is on the smaller side, you will definitely need to cook these in two batches. It’s totally worth the extra minute or two to ensure each piece gets enough space for the air to circulate properly, creating that amazing crispy texture. They can touch a little bit, but don’t stack them or force them in.
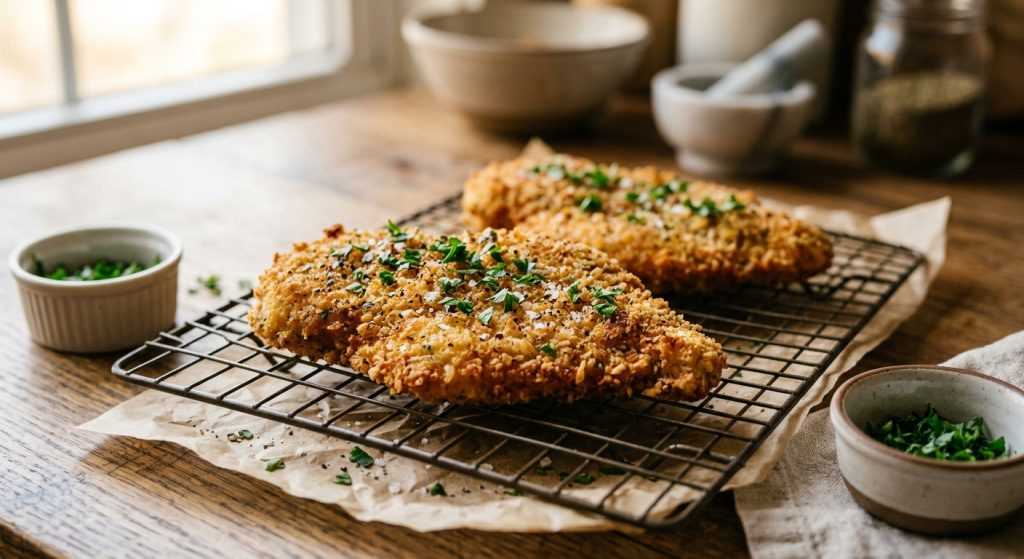
The initial cook time is 4 minutes. When that timer goes off, grab your tongs and flip each cutlet. You should already see some golden color developing. Then, let them cook for about 3 more minutes. Keep an eye on them during this final stretch. You’re looking for a rich, golden-brown exterior that just screams crispy, and a safe internal temperature of 165°F. Once they hit that sweet spot, transfer them to a wire rack to rest for a minute or two. This tiny rest allows the heat to equalize throughout the meat and keeps them extra juicy. The coating will also firm up even more as it cools slightly, giving you the best bite possible. Serve them hot and watch them disappear!