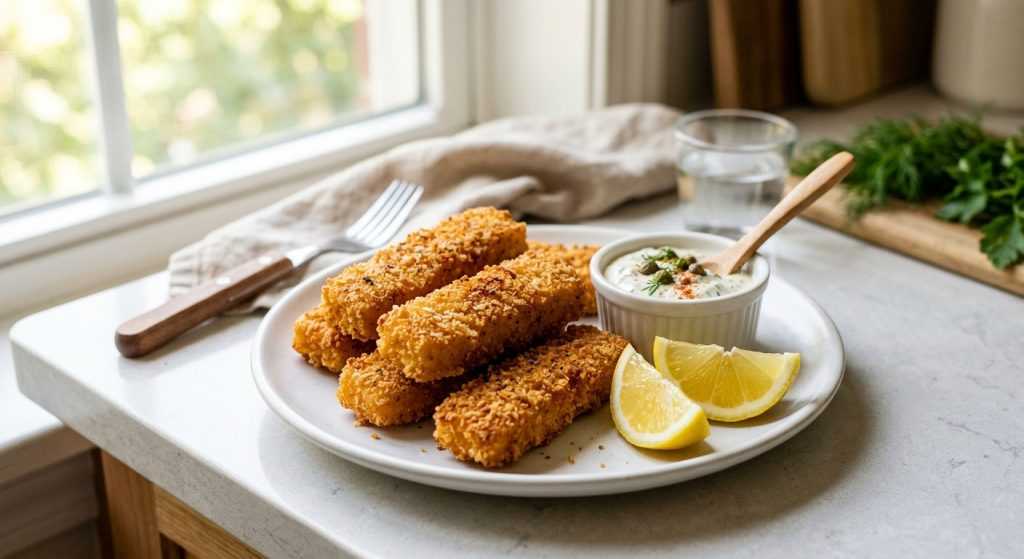
Okay, busy parents, let me tell you about these **air fryer fish sticks** I whipped up recently! If you’re anything like me, finding a dinner that’s genuinely quick, healthy-ish, and gets a thumbs-up from everyone at the table feels like winning the lottery. I’ve tested so many versions of homemade fish sticks, trying to get that perfect crunch without deep-frying, and this air fryer method is definitely the one to beat. It’s truly a weeknight lifesaver.
Imagine perfectly tender cod nestled inside a super golden, crispy Panko coating. Seriously, when you bite into these, you get that satisfying crunch, and the flaky fish just melts in your mouth. They’re miles better than anything from the freezer aisle, and you control all the ingredients. Plus, the air fryer makes cleanup a breeze, which is always a huge bonus in my book! I can’t wait for you to try them.
Prepping Your Cod for the Perfect Air Fryer Fish Sticks
Getting your fish ready is the first step to truly delicious homemade **air fryer fish sticks**. I always start with cod because it’s so mild and flaky, making it ideal for this recipe. You’ll want about a pound and a half of fillets, and make sure any skin is removed. Sometimes the grocery store fish counter will do this for you, which is a big time-saver! Once you have your beautiful fillets, it’s time to cut them into those familiar stick shapes. Aim for pieces about half an inch to an inch wide, and maybe three to four inches long. Don’t worry about them being perfectly uniform; a little rustic charm is totally fine! Just try to keep them somewhat similar in size so they cook evenly.
After cutting, generously season all sides of the cod strips with most of your salt. This isn’t just for flavor; salt also helps draw out a little moisture, which can actually contribute to a crispier coating. You don’t need to let it sit for ages, but a quick season before you set up your breading station is perfect. Pop the seasoned fish back into the fridge while you get your dredging bowls ready. This keeps the fish nice and chilled, which is important for food safety and also helps the breading stick better. Think of it as a little spa treatment for your fish before its big moment in the air fryer!
Crafting That Signature Crispy Panko Coating
Okay, this is where the magic really happens – building that incredible crispy coating! You’ll need three shallow bowls to create your breading station. In the first bowl, pour your all-purpose flour. This initial dusting acts like a primer, giving the egg wash something to really grab onto. In the second bowl, whisk up your eggs with just a couple tablespoons of water. This thins the egg out slightly, making it easier to coat the fish evenly without gloppy bits, and helps create a lighter, crisper crust. And finally, the star of the show: Panko breadcrumbs in the third bowl! Panko is seriously the best for anything you want extra crunchy. Mix in the rest of your salt, black pepper, and paprika with the Panko. The paprika gives a lovely warm color and a hint of smoky flavor that just works so well with fish.
Now, for the dredging process. Take a fish strip, dredge it completely in the flour, turning it over and gently shaking off any excess. You want a light, even dusting. Next, dip it into the egg wash, letting any extra egg drip back into the bowl. This creates a sticky layer for the Panko. Then, the final step: press the fish firmly into the Panko mixture. Make sure it’s completely covered on all sides – don’t be shy! This firm press helps the Panko adhere and prevents gaps in your crispy armor. Repeat with all your fish pieces. I usually do a little assembly line here to make it go faster. Once they’re all coated, they’re ready for the air fryer!
Air Frying Your Fish Sticks to Golden Perfection
The air fryer is truly a gift for busy kitchens, and it’s especially brilliant for these fish sticks. Before you load it up, give your air fryer basket a quick spray with olive oil cooking spray. This helps prevent sticking and also contributes to that beautiful golden-brown color we’re going for. Now, here’s a crucial tip: don’t overcrowd the basket! Air fryers work by circulating hot air, so if you pack too many fish sticks in, they’ll steam instead of crisp. I usually cook about half the batch at a time, making sure each piece has a little breathing room. Once they’re arranged, give the tops of the fish sticks another good spray with the olive oil. This is key for getting that deep, even crispness and color.
Set your air fryer to 400°F and cook for 6 minutes. When the timer goes off, carefully flip each piece over. You should already see them turning golden on the first side! Give the newly exposed side another generous spray of olive oil. Continue cooking for another 4 to 6 minutes. Keep an eye on them during this last stretch, as air fryers can vary. You’re looking for a beautiful, uniform golden-brown color and a satisfyingly crisp exterior. For food safety, the internal temperature of the fish should reach 145°F. They’ll be flaky and tender inside. Repeat this process with your second batch, and then get ready to enjoy the most perfect homemade **air fryer fish sticks** you’ve ever tasted!