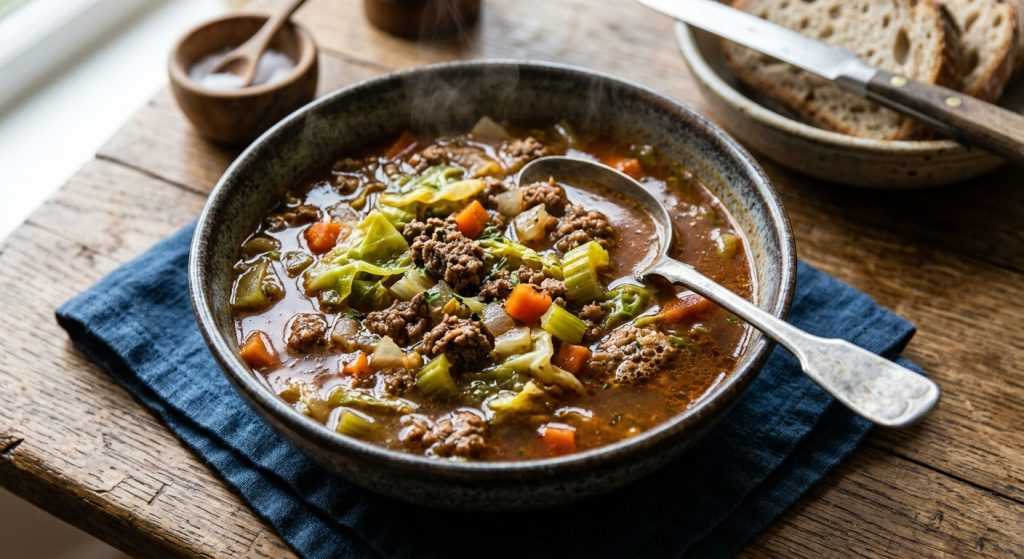
Hey friends! I just made the most comforting instant pot beef cabbage soup and had to share it with you all. Seriously, this soup hits all the right notes for a chilly evening or just when you need something nourishing that pretty much cooks itself. It’s packed with flavor, warms you from the inside out, and the best part? It uses really simple ingredients you probably already have.
As a busy parent, finding those go-to recipes that are both wholesome and easy is like finding gold. I’ve tested this one a bunch of times, playing with the ratios and cooking methods, and it’s definitely a winner. Whether you’re using your Instant Pot or going old-school on the stovetop, you’re going to love how quickly this comes together and how satisfying it is for the whole family.
Getting Started: Prepping for Your Instant Pot Beef Cabbage Soup
Alright, let’s get into the nitty-gritty of making this fantastic instant pot beef cabbage soup! The prep work here is really straightforward, which is what we love, right? First things first, you’ll want to get all your veggies chopped and ready to go. Dicing the onion, celery, and carrots might feel like a tiny chore, but having them all prepped before you start cooking makes the rest of the process flow so much smoother. I usually aim for pieces about the same size, so they cook evenly and you get a nice bite of everything in each spoonful. No super-finely minced bits here, we want that chunky soup vibe!
Once your veggies are ready, it’s time to tackle the ground beef. If you’re using an Instant Pot, hit that Sauté button and let the pot get nice and hot. A little oil spray helps prevent sticking, then in goes your ground beef and a good sprinkle of kosher salt. Break that beef up as it cooks. You want a good, deep brown color, not just grey. That browning creates so much depth of flavor for the soup base, so don’t rush this step. It usually takes about 3-4 minutes in the Instant Pot, or a bit longer in a Dutch oven on the stovetop. If you’re doing it on the stove, remember to drain off any excess fat after browning to keep the soup from getting greasy. The smell of the browning beef with that salt starting to release its aroma is always the moment I know a good meal is on its way. Then, those diced aromatics join the party, softening up and releasing their sweet scent. Cooking them for just a few minutes before adding the liquids really wakes up their flavor.
Pressure Cooking Perfection (or Stovetop Simmering!)
Now for the magic part – getting all those delicious ingredients to meld together! If you’re using your Instant Pot, after the beef is browned and the veggies have had a chance to soften, you’ll add the canned tomatoes, chopped cabbage, beef broth, and those essential bay leaves. Give everything a good stir to combine it all, then it’s time to put the lid on. Make sure it’s locked properly and the sealing vent is set to ‘Sealing.’ This is crucial for the pressure to build! We’re going for 20 minutes on High Pressure.
When that timer goes off, resist the urge to quick release! For soups, especially ones with a lot of liquid and different textures like this one, a natural pressure release is really beneficial. It helps prevent foamy liquid from spurting out, and it also lets the ingredients continue to gently cook and the flavors develop even further as the pressure slowly drops. You’ll know it’s safe to open when the float valve has completely dropped. This usually takes about 10-15 minutes, sometimes a little longer, depending on how full your pot is. If you’re going the classic stovetop route, the process is just as simple, though it takes a little more time. After browning your beef and sautéing your veggies, add the tomatoes, cabbage, broth, and bay leaves to your large pot or Dutch oven. Bring it all to a nice, gentle simmer, then reduce the heat to low. Pop a lid on and let it cook for a good 40 minutes. You want the cabbage to be really tender and almost melt-in-your-mouth soft, and for all those flavors to have time to become best friends. The broth will darken slightly and smell incredibly savory as it cooks.
Flavorful Finishes and Smart Storage
Once your soup has finished cooking and the pressure has released naturally (or your stovetop pot has simmered to perfection!), the last steps are easy. The first thing you absolutely need to do is fish out those bay leaves. They’ve done their job of infusing the soup with their subtle, aromatic notes, but you definitely don’t want to bite into one! Give the soup a good stir, and then taste it. This is your moment to adjust the seasoning. Sometimes, depending on your broth and the saltiness of your canned tomatoes, you might want to add a little more salt, or maybe a crack of black pepper. A tiny splash of apple cider vinegar at this stage can also brighten everything up if it feels like it needs a lift, but that’s totally optional. The cabbage should be soft and almost sweet, and the broth will be rich and savory.
This soup is amazing on its own, but it’s also fantastic with a side of crusty bread for dipping. For leftovers, this soup actually tastes even better the next day! The flavors deepen and meld overnight. Store any extra soup in airtight containers in the refrigerator for up to 3-4 days. It also freezes beautifully for up to 3 months, making it perfect for meal prep. Just thaw overnight in the fridge and reheat gently on the stovetop or in the microwave. It’s a wonderful way to have a wholesome, homemade meal ready to go on those super busy evenings.