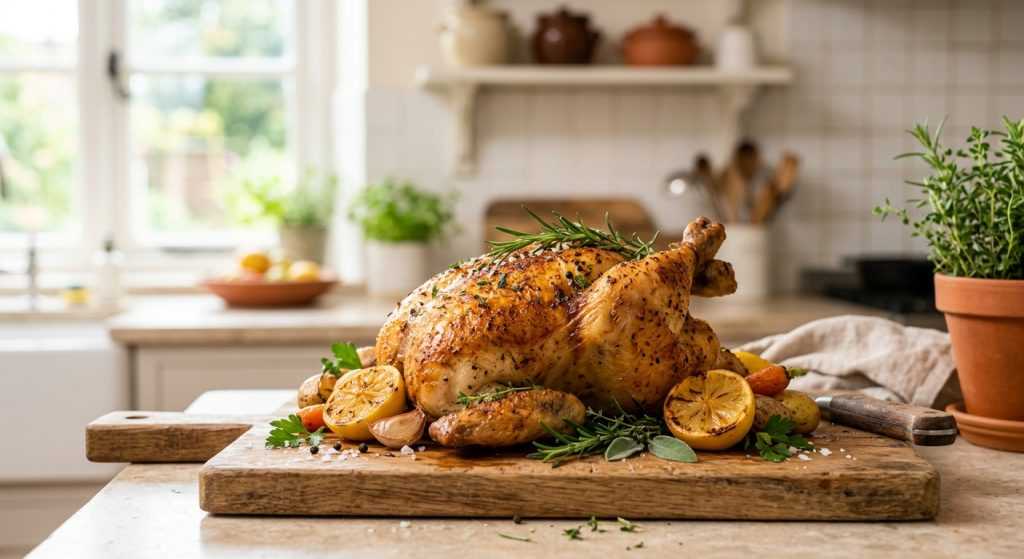
Okay, busy parents, let’s talk about dinner. Specifically, how to get a delicious air fryer whole chicken on the table with minimal fuss! I know the thought of roasting a whole chicken can feel like a big project, especially after a long day, but the air fryer completely changes that. This method gives you incredibly crispy skin and super juicy meat every single time, all while keeping things wonderfully hands-off.
I’ve made this recipe more times than I can count, tweaking it until it was just right. It’s become a staple in my rotation for those nights when I want something satisfying and flavorful, but really don’t have hours to spend in the kitchen. Plus, the whole family always seems happy with it, which is a win in my book. Get ready for a weeknight hero!
Prepping Your Chicken for Success
Alright, let’s get down to business with prepping our star: the whole chicken! This first step is absolutely vital for that incredible, crackly skin you’re dreaming of. You’ll want to gently remove any giblets or the neck from inside the chicken’s cavity – sometimes they’re tucked in a little bag. After that, grab a stack of paper towels and pat that chicken dry. And I mean really dry. Every single crevice, top, bottom, and sides. Any moisture left on the skin will essentially steam in the air fryer instead of crisping up, so a bone-dry bird is your ticket to a golden, irresistible crust. It might feel like you’re using a lot of paper towels, but the results are absolutely worth the effort.
Next up, let’s give those little wings a hug. Gently tuck the wing tips behind the chicken’s back. This isn’t just for aesthetics; it serves a couple of important purposes. First, it helps to create a more uniform shape for cooking, which means the hot air in your air fryer can circulate evenly around the whole bird. Second, and maybe more importantly, those delicate wing tips are prone to getting scorched in the intense heat of the air fryer if left exposed. Tucking them protects them, ensuring they cook through without getting brittle or overly dark. It’s a small step that pays off big time in the final texture and appearance of your beautifully cooked chicken.
The Perfect Seasoning Blend and Air Fryer Placement
Once your chicken is prepped and perfectly dry, it’s time for the flavor! This simple spice blend is one I always come back to. It’s a classic mix that really enhances the chicken without being overpowering. In a small bowl, just mix together your salt, black pepper, paprika, garlic powder, dried oregano, and dried thyme. The paprika gives it a lovely warmth and color, while the garlic and herbs bring that comforting, savory aroma that fills your kitchen as it cooks.
Now, for applying it: brush your whole chicken generously with olive oil all over. This helps the seasonings stick, but also aids in getting that gorgeous, golden-brown skin. Then, take half of your mixed spices and sprinkle them evenly over the breast side of the chicken. Make sure to get into all the nooks and crannies. Once that’s done, carefully place the chicken breast-side down in your air fryer basket. This might feel counterintuitive, but starting breast-side down allows the breast meat, which is usually thicker, to cook a bit more gently at first, bathed in the chicken’s own juices, preventing it from drying out. Now, sprinkle the remaining spice mixture over the back of the chicken. Don’t forget those thighs and drumsticks!
Air Frying Your Whole Chicken to Golden Perfection
With our chicken seasoned and nestled into the air fryer basket, it’s time to get cooking! You’ll want to preheat your air fryer to 350°F (about 175°C). Don’t skip the preheat! Just like with an oven, getting the air fryer up to temperature beforehand ensures your chicken starts cooking immediately and consistently, which is key for that beautiful crispy skin. Once it’s hot, slide that basket in and let it cook for 30 minutes. You’ll start to smell those amazing spices and the chicken will begin to turn golden.
After the initial 30 minutes, it’s flip time! Carefully open the air fryer, and using tongs or heat-safe spatulas, gently turn the chicken breast-side up. This allows the breast to get direct exposure to the circulating hot air, crisping up that seasoned skin to a beautiful, deep golden color. Continue cooking for another 30 to 35 minutes. The real test for doneness, though, is temperature. You’re looking for an internal temperature of 165°F (74°C) in the thickest part of the thigh, away from the bone. A good instant-read thermometer is your best friend here! When it hits the mark, pull it out and let it rest for at least 5 minutes before you slice into it. This resting period is super important; it lets the juices redistribute throughout the meat, keeping it wonderfully tender and moist.