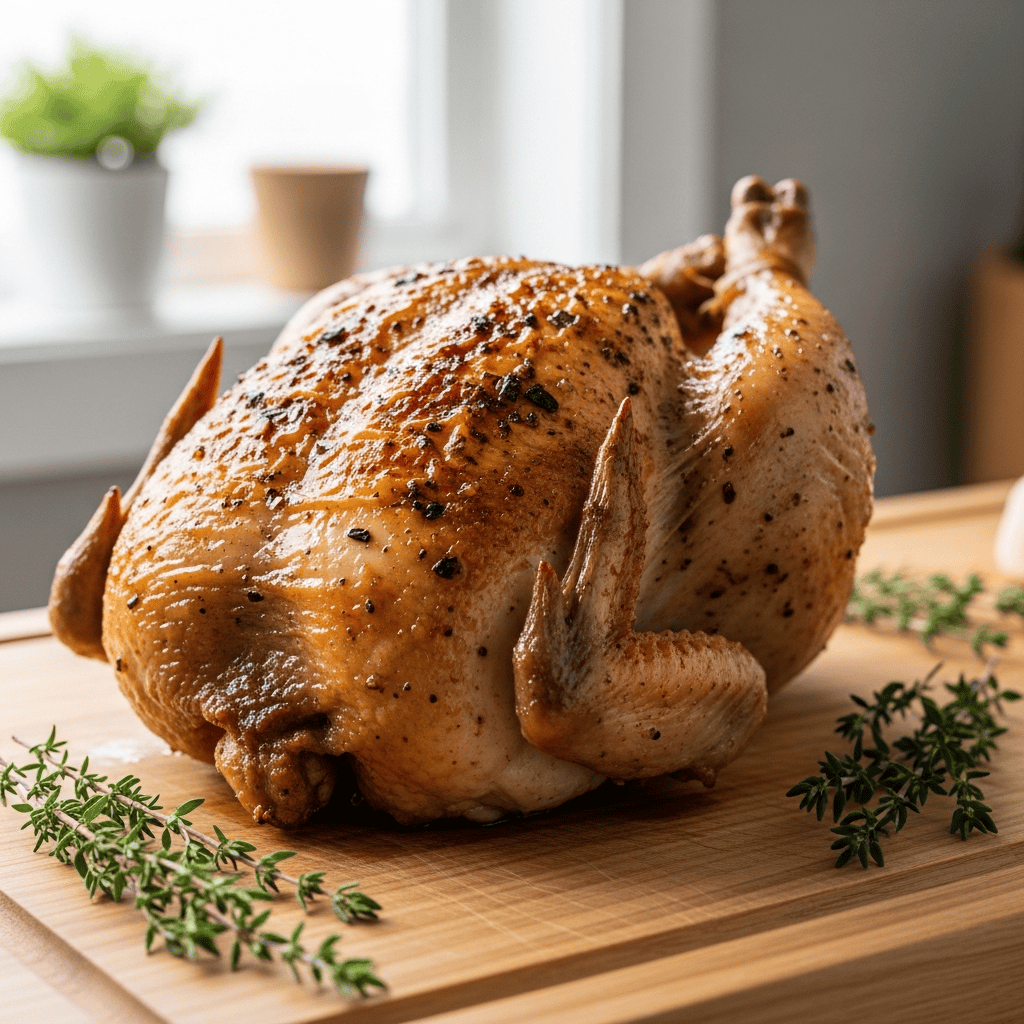
If you’ve been looking for a super simple, absolutely foolproof recipe for easy roast chicken that delivers incredible flavor and perfectly crispy skin every single time, you are in the right place. I know how frustrating it can be to spend time on dinner only to end up with dry meat or rubbery skin, so I’ve tested this method more times than I can count to make sure it always comes out right. This is the one I rely on for those busy weeknights when I still want something comforting and hearty.
What I love most about this recipe is how deceptively simple it is. Seriously, with just a few basic ingredients and a hot oven, you can create a centerpiece meal that feels fancy but takes minimal active effort. It’s the kind of satisfying dish that makes dinner feel like a win, and it’s truly perfect for the whole family to enjoy.
Prepping Your Bird for the Best Easy Roast Chicken
The secret to truly amazing roast chicken starts way before it hits the oven. First, make sure you get a good quality chicken – it really makes a difference. Once you’ve unwrapped it, give it a good rinse, and then comes the most important part: drying! Pat that chicken absolutely bone dry with paper towels, inside and out. Any moisture on the skin will create steam in the oven, and that’s the enemy of crispy skin.
Next up is seasoning. Don’t be shy with the kosher salt and fresh black pepper, especially inside the cavity. Then, if you’re feeling a little fancy (or just want the most even cooking), take a few minutes to truss your bird. It looks a bit intimidating but it’s really simple once you try it. It helps the chicken hold its shape and cook consistently, which means no dry breasts while the thighs are still catching up. Once it’s trussed, give the outside another generous shower of salt and pepper. You want to see those salt granules ready to create that perfect salty crust!
Roasting to Golden Perfection (and Juicy Meat!)
Now for the fun part! Pop your perfectly prepped chicken into a hot 450°F oven. The high heat is what gets that skin crisping up beautifully from the start. And here’s a tip I learned after many, many trials: resist the urge to baste early on. Seriously, just leave it alone! Basting or adding butter too soon can introduce moisture and steam, which means soggy skin. We’re going for a dry heat environment here.
You’ll roast it for about 50-60 minutes. The real test is an instant-read thermometer. Aim for 150°-155°F in the thickest part of the breast. It will continue to cook a bit after it comes out of the oven. If you’re using thyme, sprinkle it in the pan towards the very end, give it a quick basting with the pan juices, and then immediately transfer it to a cutting board. This brings us to another critical step: resting!
Carving and Savoring Your Hard Work
I know it’s tempting to dig right in, but letting your roast chicken rest for 15 minutes on a cutting board is non-negotiable. This allows all those delicious juices to redistribute throughout the meat, guaranteeing every bite is tender and moist. If you cut into it too soon, all those good juices will just run out onto your board.
Once rested, snip off the string and start carving. Don’t feel like it has to be super elegant – this is a home-cooked meal! I always snag a middle wing joint for myself (cook’s treat!). Make sure to check near the backbone for the ‘oysters,’ two incredibly succulent morsels of meat. Serve the breast on the bone with a wing joint still attached, and definitely add a little smear of fresh unsalted butter. It just melts into that warm, juicy meat and adds a touch of richness. This is the kind of dinner where you start with a knife and fork and happily finish with your fingers!