Easy Chocolate Peanut Butter No Bake Cookies

TOTAL TIME
SERVES
COURSE
DIFFICULTY
Tested5× before publishing

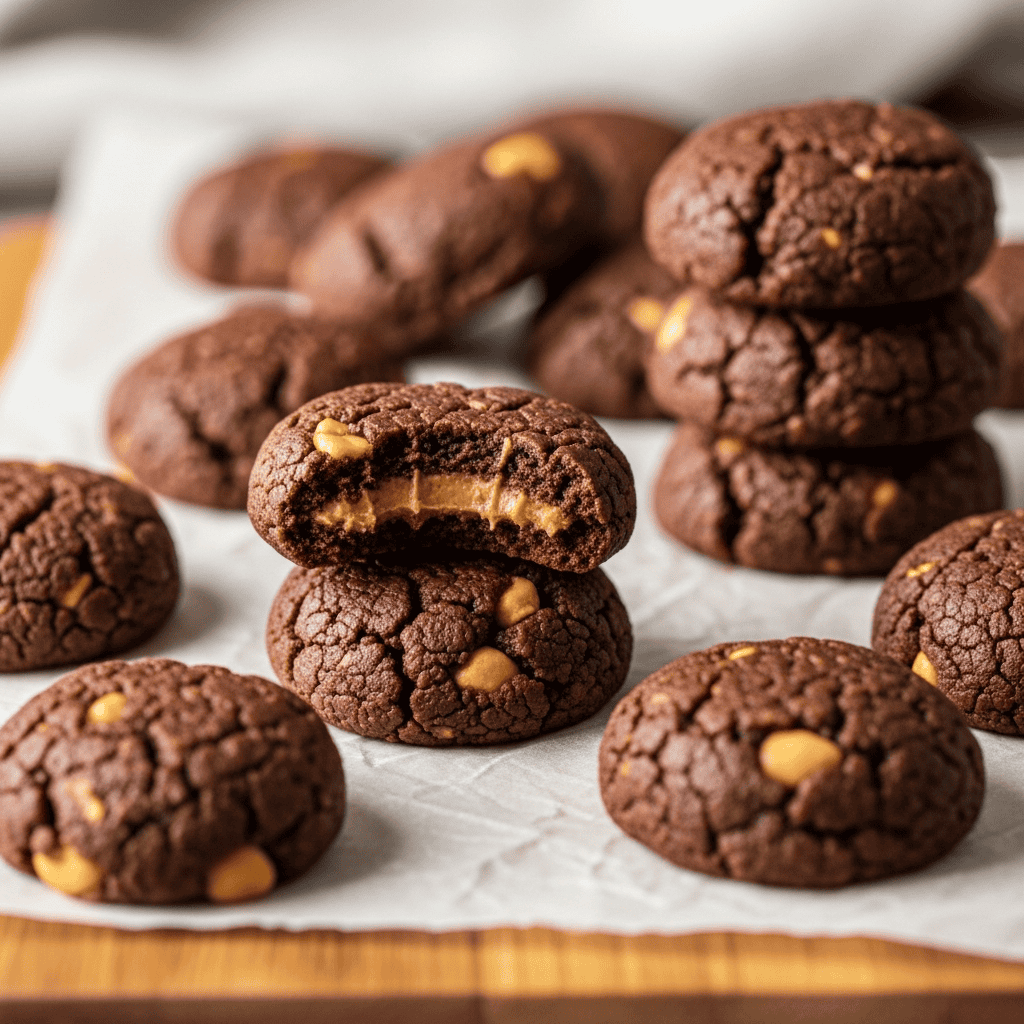
Hey everyone! You know those days when you need something sweet, like *right now*, but the thought of turning on the oven feels like too much? Been there, literally yesterday. That’s exactly why these easy chocolate peanut butter no bake cookies are a lifesaver. I tested this recipe so many times to make sure it was absolutely perfect, and honestly, they hit the spot every single time. They’re rich, fudgy, and packed with that classic chocolate-peanut butter combo we all adore.

These cookies come together super fast, using just eight common ingredients you probably already have stashed away. No fancy equipment needed, just a saucepan and a spoon! They’re perfect for those afternoons when the little ones are suddenly hungry or you just need a little something to get you through until dinner. Plus, they’re so simple, older children can even help out with the dropping and flattening. A perfect little treat for the whole family without any fuss.

Getting Started: The Stovetop Steps for Perfect Texture

Alright, so the first part of making these amazing cookies is all about the stovetop. Grab a good medium-sized saucepan – you want something that can comfortably hold all your ingredients without bubbling over too much. First, you’ll combine the butter, sugar, milk, and cocoa powder. Place it over medium heat, and here’s your first key: you need to whisk constantly at the beginning. This helps the butter melt evenly and ensures the cocoa and sugar dissolve properly into the liquids. You’ll see it start to get smooth and shiny. Keep whisking occasionally as it heats up, bringing the mixture to a full, rolling boil. You’ll know it’s there when you see lots of big, active bubbles. Once it hits that boil, set a timer for *exactly one minute*. That single minute is super critical for the cookie’s texture and ability to set. Don’t let it boil for longer or shorter!

Whip Up Your Chocolate Peanut Butter No Bake Cookies: The Mixing Fun!

As soon as that minute of boiling is up, immediately pull your saucepan off the heat. There’s no time to waste! Stir in your creamy peanut butter and the full tablespoon of vanilla extract right away. Keep stirring vigorously until both are completely melted and smoothly incorporated into the hot chocolate mixture. You want it to be a uniform, glossy brown. Next, add your three cups of oats and a tiny pinch of salt. Mix it all together until every single oat flake is coated in that rich, warm chocolate peanut butter goodness. The mixture will be thick and sticky. Now, let it sit for about 5 minutes. This brief resting period is important because it allows the oats to soak up some of that delicious moisture, which helps the cookies hold their shape and gives them that perfect chewiness.

Scoop, Chill, & The Best Part: Enjoy!

While your cookie mixture is taking its little rest, it’s the perfect time to get your workstation ready. Line two baking sheets with parchment paper or silicone baking mats. This step is a lifesaver for easy cleanup and ensures your cookies won’t stick. Also, peek into your refrigerator to make sure you have enough space for those sheets! Once the 5 minutes are up, grab a tablespoon or a small cookie scoop. The mixture will still be warm and pliable. Drop spoonfuls onto your prepared sheets, leaving a little space between each one. If you like a flatter cookie, gently press down on the tops with the back of your spoon. If you prefer them a bit chunkier, leave them as is! Once all the dough is scooped, carefully transfer the baking sheets to the refrigerator. They’ll need 30 to 60 minutes to firm up completely. The waiting is the hardest part, I know! But once they’re chilled, pull them out and enjoy a little slice of chocolate peanut butter heaven!
AD — Mediavine Content 300×250 / Responsive

Why This Recipe Works

The precise boil time (225°F/107°C) heats the sugar mixture just enough to create a stable syrup. When this hot syrup is combined with the fat from the peanut butter and butter, it binds the oats into a cohesive mixture that firms up beautifully when chilled. The oats absorb moisture during the 5-minute rest, giving that classic chewy, satisfying no-bake texture.

These cookies are a little piece of dessert heaven that practically make themselves.— Charlotte
AD — Mediavine Native / 728×90 Leaderboard

Prep 15 minutesCook 5 minutesYield 24 cookies
Ingredients
  • 6 Tablespoons unsalted butter
  • 1 and 1/2 cups granulated sugar
  • 1/2 cup milk (whole or 2%)
  • 1/4 cup unsweetened natural or Dutch-process cocoa powder
  • 2/3 cup creamy peanut butter
  • 1 Tablespoon pure vanilla extract
  • 3 cups old-fashioned whole rolled oats or quick oats
  • 1/8 teaspoon salt
Instructions
  1. Combine & Boil In a medium (about 3-quart) saucepan, combine the butter, sugar, milk, and cocoa powder. Place over medium heat. Whisk constantly until the butter is completely melted and everything is combined. Continue whisking occasionally until the mixture comes to a full boil. Once it's actively boiling, stop whisking and let it boil for exactly 1 minute. A precise temperature check would be 225°F (107°C) if you have an instant-read thermometer handy.
  2. Stir In & Rest Immediately remove the saucepan from the heat. Stir in the peanut butter and vanilla extract until they are fully combined and smooth. Finally, add the oats and salt, stirring until everything is evenly coated. Let the mixture sit for 5 minutes; this helps the oats absorb some of the liquid.
  3. Prep & Scoop While the mixture rests, line two baking sheets with parchment paper or silicone baking mats. Make sure you have enough space in your refrigerator for them. Using a 1-Tablespoon cookie scoop or just a regular spoon, drop spoonfuls of the warm dough onto the prepared baking sheets. If you like, gently flatten them a bit with the back of the spoon. Repeat until all the dough is used.
  4. Chill & Enjoy Refrigerate the cookies for 30–60 minutes. This chilling time lets them firm up properly. Once set, take them out of the fridge and dig in! Store any leftover cookies covered in the refrigerator for up to a week.
Tested Tip

The one-minute boil is absolutely critical! Boiling for less time means your cookies won't set up properly and will be too soft or gooey. Boiling for too long can make them dry, crumbly, and hard. As soon as you see a full, rolling boil, set a timer for exactly 60 seconds.

AD — Mediavine Content 300×250 / Responsive

Getting Started: The Stovetop Steps for Perfect Texture

Whip Up Your Chocolate Peanut Butter No Bake Cookies: The Mixing Fun!

Scoop, Chill, & The Best Part: Enjoy!

Make It Yours

  • Add a crunch — For an extra layer of texture, fold in about 1/2 cup of chopped peanuts, walnuts, or pecans along with the oats. It adds a lovely nutty bite that complements the creamy peanut butter perfectly.
  • Flavor twist — Want to play with the flavors? Try adding a pinch of cinnamon (about 1/4 teaspoon) with the cocoa powder for a warm spice note, or a tiny dash of almond extract (about 1/4 teaspoon) with the vanilla for a different aromatic profile.
  • Top it off — Before chilling, sprinkle a tiny bit of flaky sea salt on top of the warm cookies to really make the chocolate and peanut butter flavors pop. Or, once chilled, drizzle them with melted white chocolate for an elegant touch.
  • Less sweet — If you prefer a slightly less sweet treat, you can reduce the granulated sugar by up to 1/4 cup without drastically impacting the cookies' ability to set. However, don't go too much lower, as sugar contributes to the structure.
AD — Mediavine Content / Native

FAQ

Why didn't my no-bake cookies set properly?

The most common culprit here is the boiling time. It’s crucial to let the butter, sugar, milk, and cocoa mixture boil for *exactly* one minute once it reaches a full, rolling boil. If you boil it for less, the sugar syrup won't be concentrated enough to bind everything. If you boil it for too long, they might become dry and crumbly. An instant-read thermometer can help you hit 225°F (107°C) if you want to be extra precise!

Can I use natural peanut butter for this recipe?

For this specific no-bake recipe, I strongly recommend sticking to creamy, processed peanut butter (like Jif or Skippy) rather than natural varieties that require stirring. Natural peanut butter often separates oil, which can make the cookies greasy and prevent them from setting correctly. The consistency of standard creamy peanut butter is key here.

How should I store leftover chocolate peanut butter no bake cookies?

These cookies are best stored in an airtight container in the refrigerator. They will stay firm and delicious for up to a week. Keeping them chilled maintains their chewy texture and prevents them from getting too soft or sticky at room temperature.

Can I freeze these chocolate peanut butter no bake cookies?

Absolutely! Once the cookies are completely set and firm from chilling, you can arrange them in a single layer on a baking sheet and freeze them until solid. Then, transfer the frozen cookies to an airtight freezer-safe container or bag. They will keep well in the freezer for about 2 to 3 months. When you're ready to enjoy them, simply thaw them in the refrigerator for a few hours.

AD — Mediavine 728×90 Leaderboard / Responsive

What To Serve With This

  • A tall glass of ice-cold milk
  • Your morning or afternoon cup of coffee
  • A scoop of vanilla bean ice cream
  • As an easy after-school treat
  • With a good book and a cozy blanket

This post contains affiliate links. We may earn a small commission at no extra cost to you.

More Recipes You'll Love

Tested twice, weeknight-ready, family-approved.